
Based on expert consensus regarding technical skill, breath control, and dexterity, the oboe and violin are frequently ranked as the hardest instruments to master. Key challenges include controlling double reeds, coordinating complex hand movements, managing intense breath pressure, and achieving precise pitch on fretless necks.
Here are 10 of the hardest instruments to play:
1. Oboe
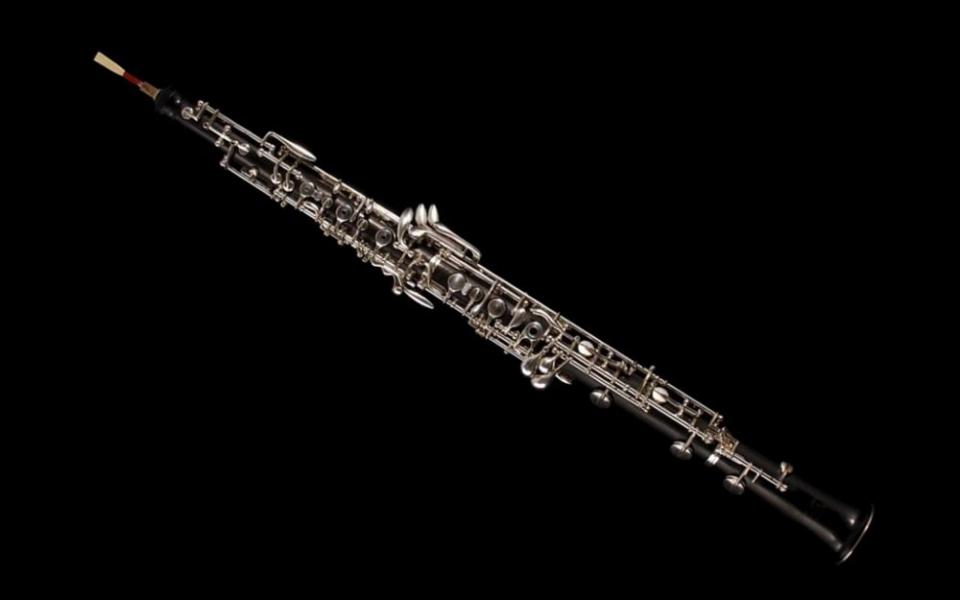
Requires intense embouchure control, delicate double reed manipulation, and precise breath management.
2. Violin
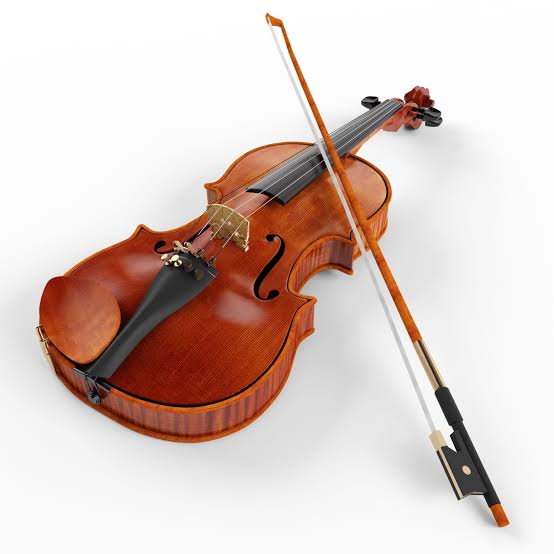
Challenging due to the lack of frets, requiring perfect finger positioning and sensitive bowing technique.
3. French Horn
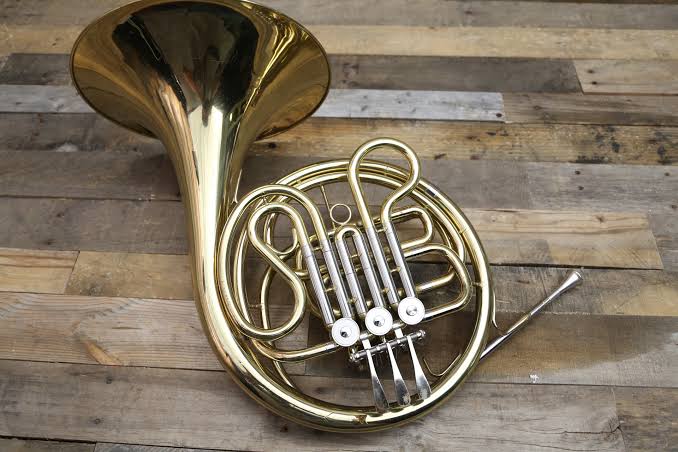
Demands extreme precision in lip positioning (embouchure) to hit correct notes among closely spaced harmonics.
4. Bagpipes
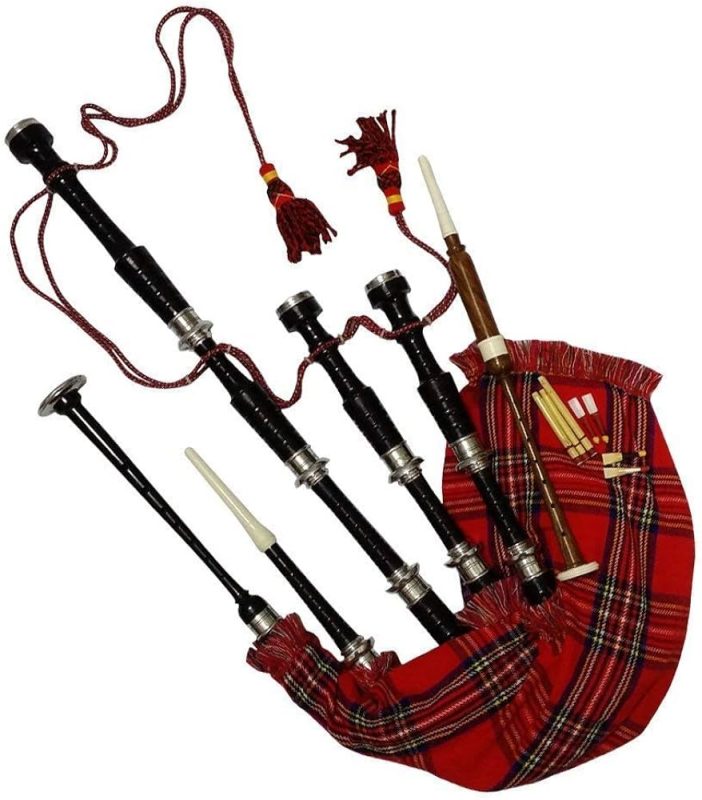
Requires constant air pressure from a bag while managing complex fingerwork on the chanter.
5. Accordion
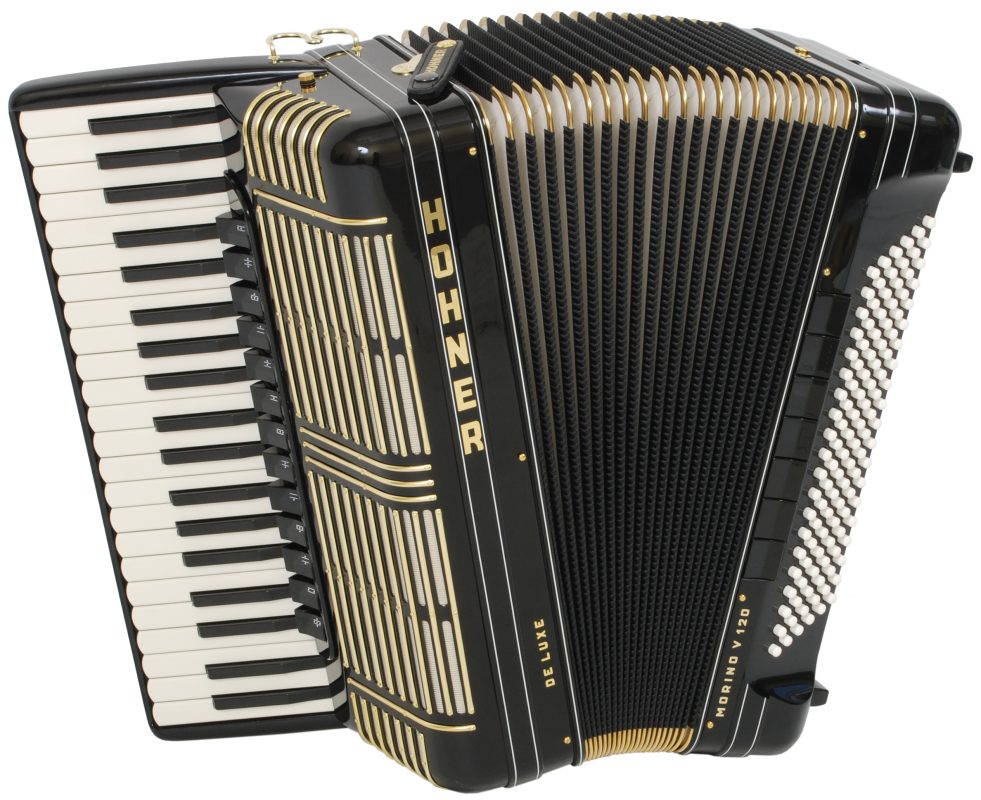
Demands high-level independence between both hands, managing bellows pressure, and handling numerous buttons.
6. Harp
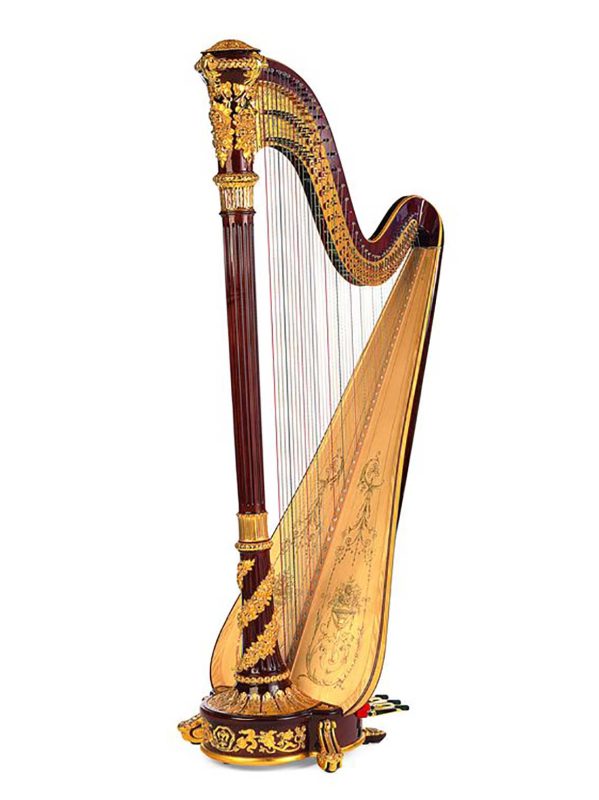
Involves coordinating all ten fingers independently while operating pedals for pitch changes.
7. Pipe Organ
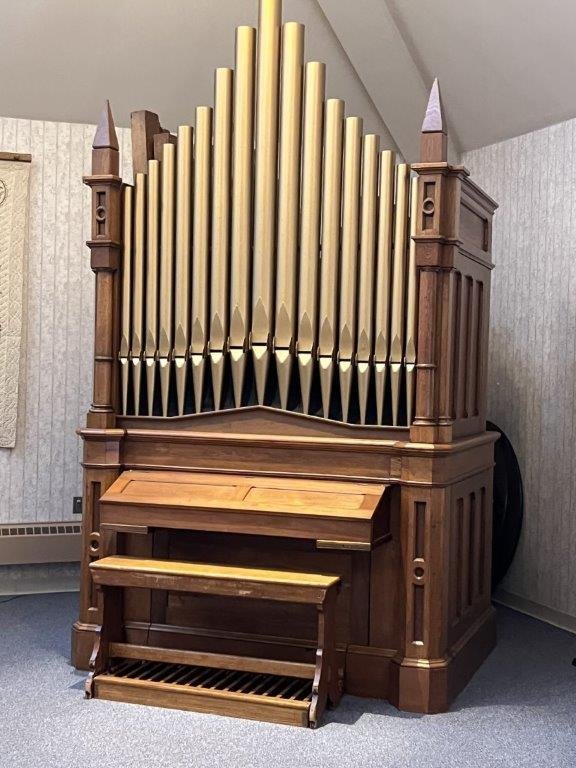
Demands complex multi-limb coordination, playing multiple keyboards and pedals simultaneously.
8. Bassoon
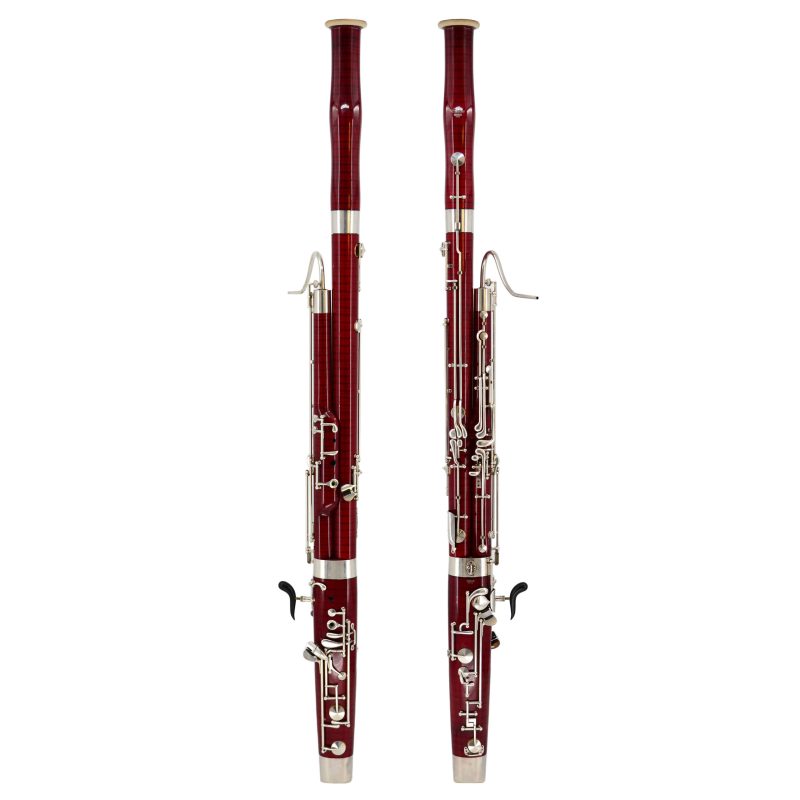
Similar to the oboe, it requires complex fingering and precise double reed control to play properly.
9. Theremin
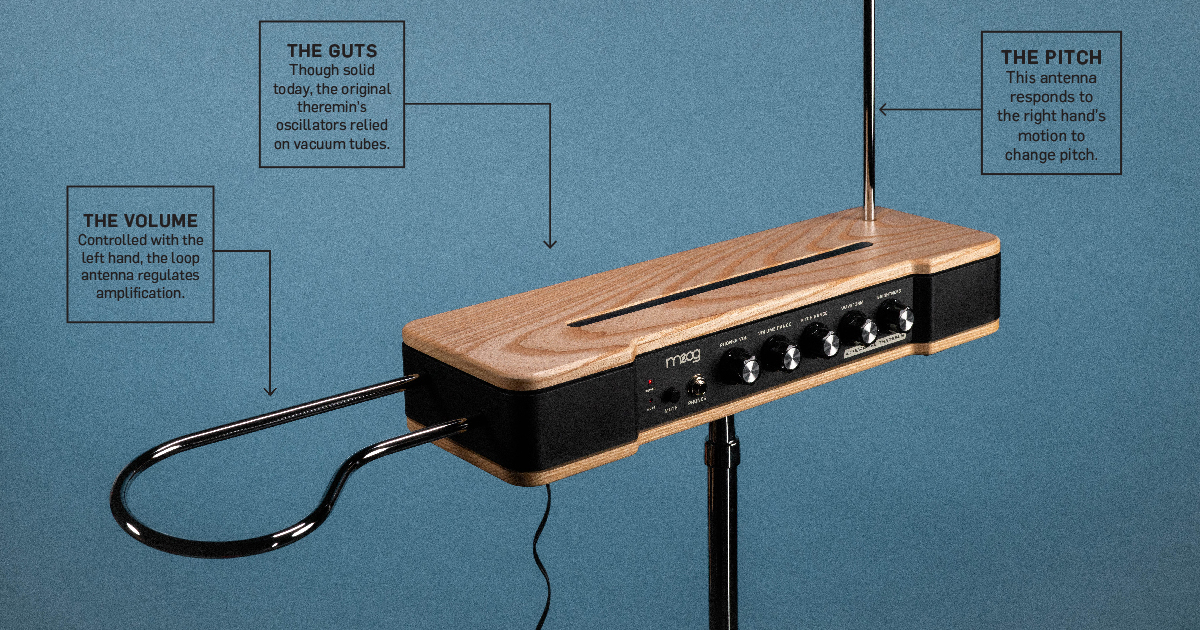
Played without physical contact, requiring perfect spatial awareness to control pitch and volume.
10. Sitar

Features 18-21 strings and requires complex techniques like sideways string pulling (meend).
.  Click Marvin Empire for a free consultation – Quick response, Pickup or Same-day delivery
]]>
Here is a list of the top 10 musical equipment stores in Lagos, Nigeria, with Marvin Empire at the top of the list:
Are you looking for where to shop quality musical and sound equipment? Below is a list of top musical equipment stores in Lagos Nigeria, where you can shop for quality musical equipment brands in 2026.
Top 10 Musical Equipment Stores in Lagos, Nigeria in 2026
1. Marvin Empire
Marvin Empire Nigeria Limited specializes in the sales, rentals, repairs, and maintenance of musical instruments and accessories, serving both beginners and professional musicians. From guitars, keyboards, violins, drums, and audio equipment to instrument accessories and spare parts, Marvin Empire provides quality products, flexible rental services, and professional repair solutions tailored to musicians, churches, schools, studios, events, and music enthusiasts across Nigeria.
2. Musicians Mall
This store has a large physical location in Lagos as well as an online presence, making it a convenient option for those who prefer to shop in person. They carry a wide range of musical instruments and equipment from top brands.
3. Irukka Online
This online store is known for its wide selection of high-quality musical instruments and equipment at competitive prices. They offer everything from guitars and drums to keyboards and recording equipment.
4. Konga
Another popular online marketplace, Konga is a great place to find a variety of musical equipment at competitive prices. They offer a wide range of instruments and equipment from top brands.
5. Deallo Electronics
This online store specializes in electronics, including musical equipment. They offer a wide range of instruments and equipment at reasonable prices.
6. E-sound Audio
This online store offers a wide selection of musical instruments and equipment, including keyboards, guitars, and recording equipment.
7. Guitar World
As the name suggests, this store specializes in guitars and related equipment. They offer a wide range of electric, acoustic, and bass guitars from top brands.
8. Jumia
This popular online marketplace offers a wide selection of musical equipment from various sellers. You can find everything from guitars and keyboards to recording equipment and DJ gear.
9. Beat Production
This online store offers a wide range of music production equipment, including keyboards, DJ gear, and recording equipment.
10. BusyWorkBeats
This online store specializes in music production equipment, including keyboards, DJ gear, and recording equipment.
Above is the top online musical equipment store to shop for original musical and sound equipment in 2026.With Marvin Empire top on the list, we house world-class brands. We are the major distributor and dealer for top brands. So we make the selection readily available and affordable for you.
Please note that this list is based on my own research and is not exhaustive. It is always a good idea to do your own research and compare prices and reviews before making a purchase.
. Click Marvin Empire for a free consultation – Quick response, Pickup or Same-day delivery
]]>
When looking to buy authentic and high-quality instruments in Nigeria, leading retailers like Irukka Online, Cousins Nigeria Ltd, Marvin Empire,and Dekings Musicals stand out for their wide selection of top brands, warranties, and nationwide delivery.
The top companies operating in the Nigerian musical instrument market include:
1. Irukka Online

Irukka Online (part of Irukka Group) is Nigeria’s largest online and offline sound equipment and musical instrument store. They are the sole and major distributors of globally recognized brands, specializing in high-quality professional audio gear, recording equipment, and general merchandise for churches, events, and studios.
2. Cousins Nigeria Ltd

Cousins Nigeria Limited is a premier Nigerian audio-visual equipment store, operating since 1986. They specialize in the importation and distribution of professional audio, public address systems, musical instruments, and stage lighting.
3. Dekings Musicals

Dekings Musicals is a leading Nigerian music gear, sound equipment, and instrument retailer based in Lagos, providing quality audio solutions for churches, studios, artists, and live events since 2019.
4. Musicians Mall

Musicians Mall in Nigeria isn’t a single physical mall in the way you’d think of Ikeja City Mall. It’s mainly an online storefront on Jumia Nigeria that sells musical instruments and gear. You’ll find guitars, keyboards, microphones, studio monitors, DJ equipment, audio interfaces, and accessories from brands like Yamaha, Shure, M-Audio, Behringer, KRK, and Pioneer.
5. Jumia Nigeria

Jumia Nigeria is Nigeria’s largest online marketplace, often called the “Amazon of Africa” for the country.
An e-commerce platform where you can buy everything from electronics, fashion, phones, home appliances, groceries, and even musical instruments through dedicated storefronts like Musicians Mall.
6. Konga

Konga is one of Nigeria’s leading e-commerce platforms and Jumia’s main competitor — often called a “composite e-commerce giant” because it’s more than just an online store. Konga sells electronics, phones, home appliances, fashion,musical instruments,groceries, and lifestyle products through its website and app. It also runs Konga Retail with physical stores nationwide where you can touch and test products before buying.
7.Hennessey Music (or equivalent authorized dealers)

Hennessey Music refers to the musical artist and independent production ventures of Shawn Hennessey, Mark Hennessey, or Erin Hennessey. If you are looking for an authorized music dealer or a sound equipment retailer, the industry-standard equivalent is Harmonix Music.
8. Best 7
Top musical instrument sales companies in Nigeria, such as Irukka Online, Cousins Nigeria, and Dekings Musicals, provide a wide range of sound equipment, instruments, and accessories, offering nationwide delivery and authorized brand products. Top retailers, with many located in Lagos, offer high-quality instruments and professional sound gear.
9. Marvin Empire

Marvin Empire Nigeria Limited specializes in the sales, rentals, repairs, and maintenance of musical instruments and accessories, serving both beginners and professional musicians. From guitars, keyboards, violins, drums, and audio equipment to instrument accessories and spare parts, Marvin Empire provides quality products, flexible rental services, and professional repair solutions tailored to musicians, churches, schools, studios, events, and music enthusiasts across Nigeria.
10. Gopandy Musicals

Gopandy Musical is a well-established Nigerian musical instrument retailer, operating for over 40 years as a trusted online and physical destination for high-quality audio gear and instruments. Based in Lagos with a presence in Port Harcourt, they offer a wide range of products including guitars, drums, pianos, and studio equipment.
]]>.

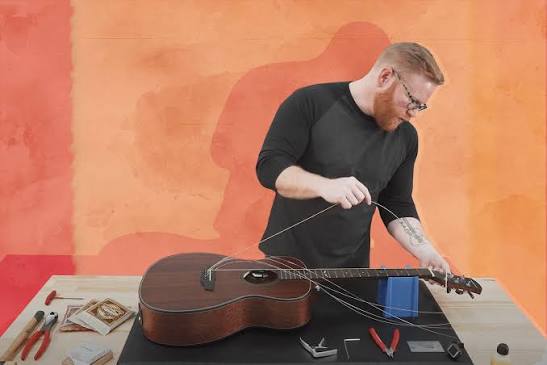
Common, manageable guitar problems include high string action, fret buzz, tuning instability, loose hardware, and rusty strings. Fixing these at home often requires basic tools like screwdrivers, Allen keys, and a string winder, helping to improve playability without a professional technician.
Here are 5 common guitar problems and their home fixes:
- High Action (Difficult to Play): Strings are too far from the fretboard, requiring extra pressure.
- Fix: Adjust the truss rod for neck relief, and lower the bridge saddles slightly, advises.
- Fret Buzz (Buzzing Noise): Occurs when strings vibrate against frets, often caused by low action or a back-bowed neck.
- Fix: Check neck relief; adjust the truss rod if necessary, and raise the bridge saddles if the action is too low.
- Poor Tuning Stability: Guitar constantly falls out of tune.
- Fix: Lubricate the nut slots with graphite (pencil lead) to prevent strings from catching, and ensure strings are wrapped properly around tuners.
- Loose Input Jack/Hardware: The input jack becomes loose on electrics, causing signal failure.
- Fix: Use a wrench (often 13mm) to tighten the nut on the jack, and check other screws (like strap buttons) to ensure they are secure.
- Rusty/Corroded Strings: Strings sound dull or feel rough.
- Fix: Change the strings, and prevent future issues by wiping down strings with a cloth after playing to remove sweat and moisture.
Do you want to fix your guitar,or you need a professional repairer?
Click Marvin Empire.
]]>Playing the trombone is a rewarding musical experience, but to maintain sound quality and ensure your safety, it’s crucial to pay special attention to the hygiene and maintenance of your instrument. Here’s a practical guide to keeping your trombone in top shape.
1. Regularly Clean the Mouthpiece
The mouthpiece is the direct point of contact between you and your trombone, and its maintenance is essential. Clean the mouthpiece regularly using a specialized brush and a bit of mild soap. This will prevent the buildup of saliva residue and debris, ensuring optimal hygiene.
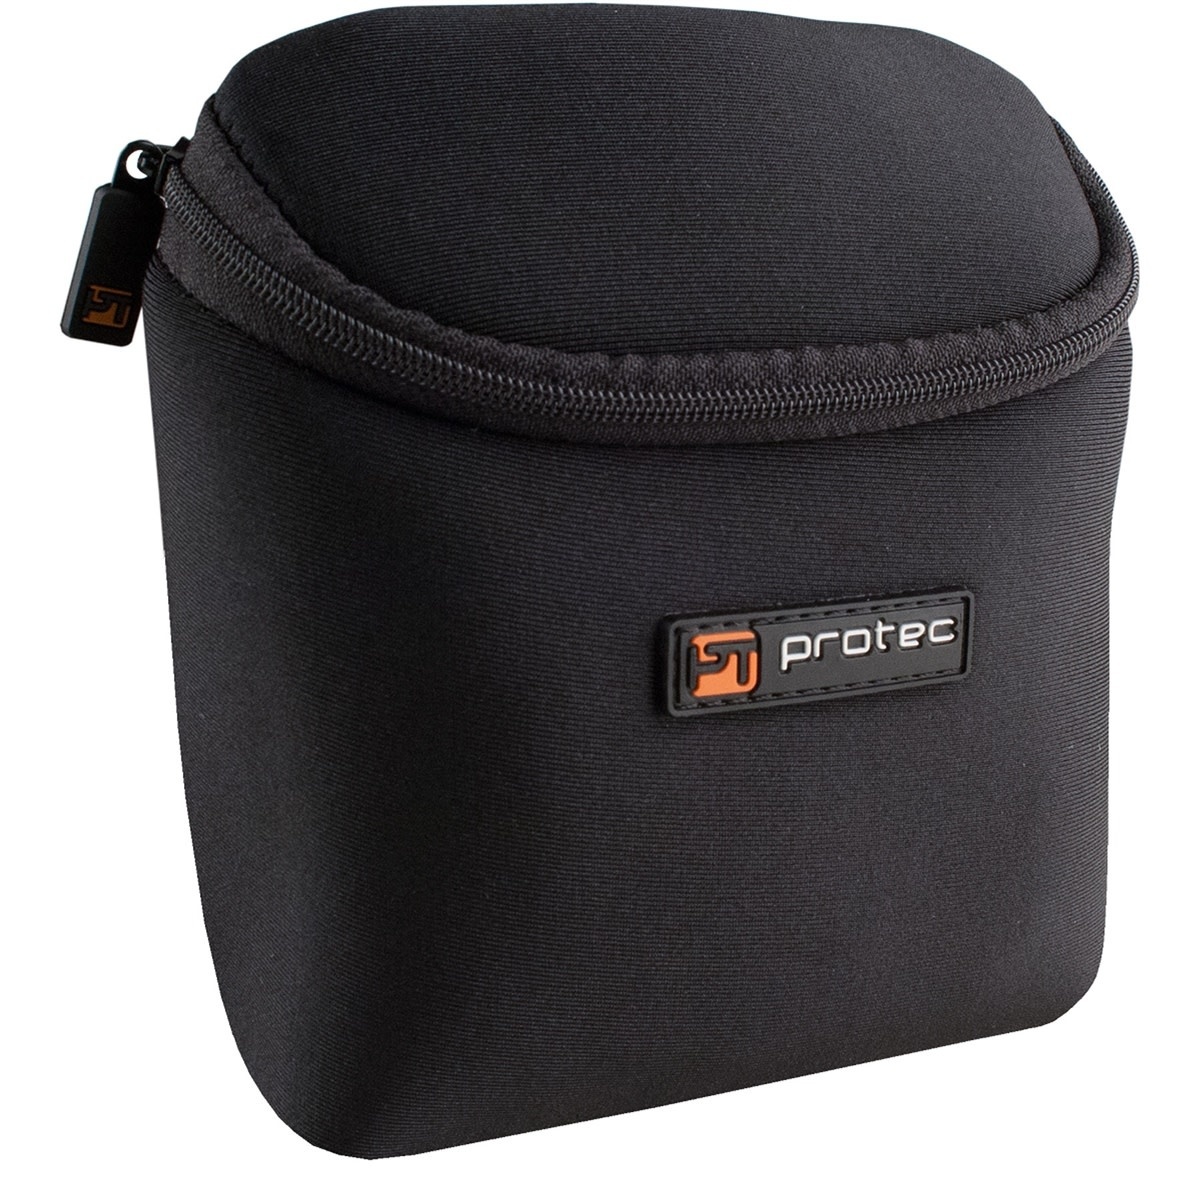 We suggest that you equip yourself with a mouthpiece pouch to keep the mouthpiece clean as well as a special brush to clean the interior of the mouthpiece.
2. Find the Right Slide Grease for You
Slide grease is the essential lubricant to ensure the proper functioning of the moving parts of your trombone. Explore different types of slide grease to find the one that suits your instrument best. Apply it once a week after removing any grease residues with a cloth. Use a small water spray bottle to spray water on your slide throughout the week and immediately after applying new slide grease
We recommend these two brands that are the most popular
Yamaha Slide Lubricant
Slide-O-Mix
3. Clean the Inner Slide
The inner slide is often overlooked, but its regular cleaning is crucial. Use a suitable cleaning rod or cloth to reach internal areas, removing any residue that could impede smooth slide movement.
We recommend this easy-to-use swab but explore all the cleaning swabs and cloths available
4. Clean the Outer Slide
Just like the inner slide, the outer slide requires special attention. Clean it with a soft, lint-free cloth to avoid damaging the surface. This will ensure a smooth slide and preserve the shine of your trombone.
We recommend this easy-to-use swab
5. Grease the Slides and Oil the Valve
 Well-greased slides and properly oiled valves are essential to maintain the fluidity of movements. Use a small amount of special slide grease and valve oil. Make sure not to apply too much but distribute it evenly to avoid excess.
For tuning slide we recommend the Twigg Musique Tuning Slide Grease
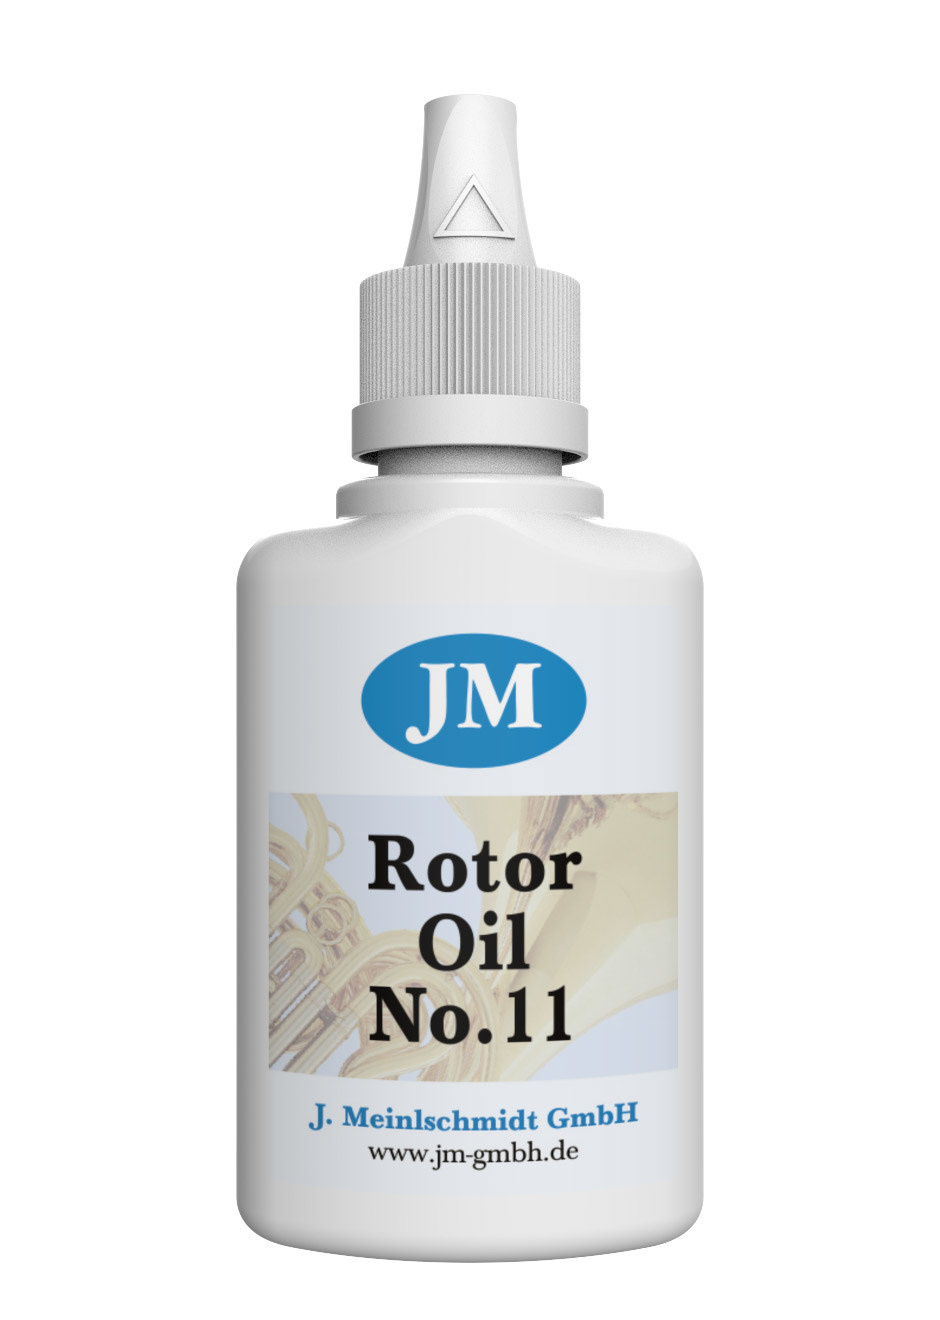
For trigger and valves we recommend the Meinlschmidt Oil
6. Professional Maintenance
Despite your constant efforts, it’s recommended to entrust your trombone to professional technicians once a year. Even with meticulous cleaning throughout the year, some dirt accumulations may escape our means. Professional maintenance ensures a thorough cleaning and adjustments if necessary, ensuring the longevity of your instrument.
Make an appointment today to professionally clean your trombone
]]>Before you play…
Wash your hands before attempting to play your trombone. The dirt and oil can tarnish the finish. Brushing your teeth or washing your mouth out will also help prevent build-up inside of the trombone. If wearing jewelry, make sure it doesn’t touch the trombone. Loose Jewelry can get caught on the instrument or damage the finish. It’s also important to make sure the slide is properly oiled. Be sure to check the instrument for any issues, whether it be dings, loose parts or dirt build-up. Be aware of your surroundings, even light bumps can do more damage then you’d think.
Assembly
The trombone is stored in two pieces, the slide and the bell assembly. *If this is your first time assembling your trombone, please wait for your teachers instructions before attempting.
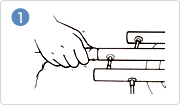
- Take both the slide and bell assembly out of the case
- While holding the Bell assembly, attach the slide at a 90-degree angle and gently tighten the receiver nut.
- Insert the Mouthpiece into the receiver gently. Excessive force is not necessary.
Cleaning
In order to maintain the trombone, it is important to properly clean it after each use. Keeping it clean is also important for your health by avoiding the build up of bacteria. Moisture can build up in the trombone and cause damage. Household cleaners or other liquid cleaners should not be used on trombones.
- For Exterior: Use a brass polishing cloth to gently wipe down the finish to remove any build-up and fingerprints.
- For Interior: After each use, the trombone should be emptied of moisture using the water key on the end of the slide. Blowing through the instrument and pressing those keys will empty the instrument.
- For Mouthpiece: After each use wipe down and clean out the mouthpiece. To deep clean the mouthpiece, it can be submerged in warm water with dish detergent, then dried.
Care Tips
Like any instrument, the proper care of your trombone is important in keeping it sanitary and playable. Keeping it safe is equally important as repairs can be costly and time consuming. Here are some tips for keeping your trombone in top shape.
- Do not stand the trombone on its bell. It is not meant to balance and can be easily damaged.
- Oil hand slide every few sessions. Keeping the trombone properly lubricated will reduce friction and wear.
- The mouthpieces don’t require much force to sit in the receiver. If the mouthpiece is pressed to hard it can get stuck. If it does get stuck, do not try and remove it yourself. It can cause more severe damage and should be done by a professional.
- When putting the trombone in the case, don’t put extra accessories in the case on top of the instrument. The pressure could damage the instrument.
Repairs
It’s advised that you get your trombone professionally maintained once a year to make sure it’s in top playing condition and to prevent major damage. If you experience a problem or situation that is not covered here, have a question anything trombone related or you think that your trombone needs professional care, please reach out to us below.
]]>
tips ?
- Before you open your case, be sure that it is right side up.
- When attaching the slide to the bell section, make sure you don’t move the bell section too close to the slide. Keep it at a 45-degree angle.
- Insert the mouthpiece into the slide with a gentle twist. DO NOT hit or pop the mouthpiece into the slide.
- Always leave the slide locked when you put your horn down or in the case.
when you have finished playing
- The moisture that accumulates inside the instrument is not “spit.” It is condensation from the player’s breath. Open the water key and blow air (don’t buzz) into the instrument. Empty the water key onto the floor, not on your chair or your neighbor’s shoe.
- If your mouthpiece gets stuck while playing, DO NOT attempt to remove it yourself or have anyone else yank it out for you. Forcibly removing a stuck mouthpiece can do serious damage to your instrument. The mouthpiece should be removed by your teacher or by the repair shop.
regular maintenance
- To keep instrument clean, don’t eat candy or chew gum before playing and never while playing.
- Do not let anyone else play your instrument. The trombone is a delicate instrument, which must be handled carefully. If you must set it down during class, put it on a flat surface.
- Clean your mouthpiece at least once a week by flushing it with warm (not hot) water.
- Proper cleaning and lubricating of the main slide is essential to the playing of the trombone. Oil the main slide as needed.
- Once a month, give your trombone a bath. Take the trombone completely apart. Soak all the parts in warm (not hot), mild, soapy water. Rinse all of the parts off in clean lukewarm water. Wipe the water off the outside of the horn. Don’t leave the instrument in the water too long or the finish may peel off. Put the trombone back together. When the instrument is dry, oil the main slide and grease the tuning slide.
- Always keep your trombone in its case when you are not playing it. Never put anything into your case that it was not designed to hold because the pressure from papers or music can damage the instrument.
Cleaning the tuning slide
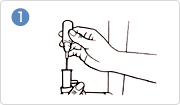
- 1. Wrap a polishing gauze around the cleaning rod so that the metal is not exposed, and insert it to remove dirt from the interior of the inner and outer tuning slide. When you remove the cleaning rod, make sure there is no gauze left in the tube.
- 2. Use some gauze to clean dirt from the surface of the inner tuning slide, then apply a small amount of slide grease. This grease is for use on tuning slides only. Never use it on the slide. Slide the tuning slides back and forth several times to distribute the grease evenly.
If you used a hard stick type of grease there will little stretching, and the film may not be even. In this case it could dry out easily. If this worries you, try spreading soft type slide grease (soft) with your finger over the entire surface.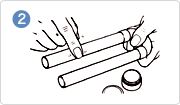
- 3. If the movement of the tuning slide is sluggish, there may be dirt, rust, or scratches on the surface of the inner tuning slide and outer tuning slide, or the tuning slide itself could be twisted (not parallel).
If you thoroughly clean the tuning surfaces with polishing gauze and apply slide grease and the movement is still sluggish, have the instrument inspected and repaired at a shop.
Advice
Valve oil is for pistons. Do not use it on the tuning slide.
Maintaining the rotary valve
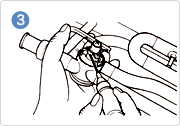
- 1. Apply some rotor oil to the rotary valve through the slide receiver end.
- 2. Remove the rotary valve cap and apply a small amount of rotor spindle oil to the center of the rotary valve and the area supporting the shaft.

- 3. Also apply small amounts of rotor spindle oil to the rotor rotation shaft and its receiver. After applying oil, close the valve cap and move the lever a few times to distribute the oil evenly.
- 4. Apply some lever oil to the lever support mechanism.

Advice
When using an oil nozzle, be careful to avoid making direct contact with the rotor, as the tip of the nozzle is made of metal.
The tip of the oil bottle is made of metal, so be very careful that it does not make direct contact with the rotor.
For more information, refer to the section of oiling the rotary valve on the horn page.
Other care and maintenance
Cleaning the mouthpiece
Prepare a brass soap water solution. Mix 1 part brass soap with between 10 and 15 parts warm water (30°C to 40°C).
Soak the mouthpiece brush in the solution, then use the brush to clean the mouthpiece’s throat. Finally, rinse the mouthpiece thoroughly with clean water.
Cleaning small parts
Don’t forget to clean the small parts of your instrument. Use a piece of gauze twisted into a string to do so.
Cleaning the water key hole
If the water key hole is dirty, use some tone hole cleaner to clean it.
]]>Summer has arrived, bringing longer days, warmer temperatures, and a new set of challenges for voice-over professionals. Heat and humidity can have an impact on both your vocal performance and the condition of your recording equipment, particularly your microphone. Proper microphone maintenance during the summer months is critical to keeping your gear in good working order and allowing you to deliver high-quality recordings consistently. Here are some important suggestions for keeping your microphone in good condition this summer.
1. Maintain It Dry and Cool.
Similar to many other electrical gadgets, microphones are not good in extremely hot or humid environments. The sensitive internal parts of your microphone may be harmed by excessive dampness, which could result in diminished functionality or even catastrophic failure. To stop this from happening:
Air Conditioning: To maintain a constant temperature and humidity level, keep your recording environment air-conditioned. In addition to shielding your microphone, this will create a cozy recording environment.
Avoid Direct Sunlight: Whether you’re indoors or outside, never leave your microphone in direct sunlight. Extended exposure might lead to overheating and internal circuit damage.
Use a Dehumidifier: If your home is located in a very humid place, you might want to think about adding a dehumidifier to your recording room. This will guard against moisture damage to your microphone and assist regulate the humidity levels.
2. Constant Cleaning
Your microphone’s functionality and sound quality may be impacted over time by dust and debris buildup. Maintaining the optimal condition of your microphone requires regular cleaning.
Apply a Gentle Brush: Using a brush with softer bristles, carefully remove any dust or debris from the microphone grill. Take care not to overpress or you risk damaging the grill.
Alcohol Wipes: Use alcohol wipes to give your microphone’s exterior a more thorough cleaning. Use only wipes that are suitable for electronics, and make sure no liquid gets inside the microphone.
Pop Filter Maintenance: Remember to clean your pop filter regularly. Pop filters have the potential to hold onto moisture and spit, which can harbor bacteria. Take out and clean the filter.
3. Inspect the connections and cables.
Poor-quality cables and poor connections can cause problems with sound quality and potentially harm your microphone. Examine your cords and connectors regularly:
Examine Your Cables: Check for fraying or exposed wires, as well as other indications of wear and strain. As soon as possible, replace any broken cables.
Stable Connections: Check that every connection is dust-free and safe. Your recordings may suffer from interference and poor quality due to loose connections.
4. Proper Storage
Proper storage is essential to shielding your microphone from physical harm and environmental elements when not in use.
Microphone casing: Make an investment in a high-quality casing for your microphone that provides defense against impact, moisture, and dust. When your microphone is not in use, keep it in its case.
Dry Environment: Keep your microphone in a cool, dry location. Keep it out of places like basements and attics where there are significant temperature swings or heavy humidity.
5. Expert Maintenance
Do not hesitate to seek professional assistance if you discover any problems with your microphone that you are unable to fix on your own:
Regular Servicing: To keep your microphone in its best shape, think about getting it professionally serviced once a year. An expert technician may examine and clean the internal parts, spot any possible problems, and carry out any required maintenance.
Warranty Check: Verify the terms and conditions for maintenance and repair services if your microphone is still covered under warranty. Many manufacturers provide subsidized or free servicing while a product is still covered by warranty.
To guarantee reliable, high-caliber recordings, you must take care of your microphone in the summer. You can preserve your investment and keep producing top-notch voice-over work all summer long by keeping your microphone cold and dry, cleaning it regularly, storing it correctly, inspecting the cables and connections, and getting professional servicing when necessary. Remember that giving your best performance depends on having a well-maintained microphone!
]]>: Effective care and feeding of the thing you record with so it doesn’t betray you
Welcome to my microphone maintenance cautionary tale of woe. Weeping and gnashing to teeth. Angst. Insert your favorite frustrating effigy of detriment here.
If you’ve been following me anywhere on the internet of tubes, you’re familiar with the challenge I ran into recently where my primary microphone wonked out. And shortly after shipping it to the manufacturer for repair, my secondary and backup microphone also wonked out for the exact same reason.
YIKES and WOAH.
I’ve been pontificating about backup plans and backup plans to backup plans for the last couple weeks as a result. However, there’s an old saying: “An ounce of prevention is worth a pound of cure.”
Which means “do a little bit of stuff now so that you’re not having to do a LOT of stuff later.”
Because the “a lot of stuff” option sounds like work. We’ve already discussed my allergy.
In any event! Onward we discuss the microphone maintenance things that you can do to keep your microphone in working order for longer periods of time. In the case of large diaphragm condenser microphones – one of the more common options for recording singing and voice – the electrostatic potential of the extremely thin plates that capture sound can be completely ruined by the environment it is in. Shotgun microphones – the other voiceover weapon of choice – are less likely to have the same propensity of environmental junk collection but the potential is still there.
(note … to …. self …… never. … use …. the words … shotgun microphone … and …. weapon of choice …. together …. again ……. ever …..)
So! Let’s solve problems!
Proper Care During Usage
We’re going to talk about proper storage of the microphone in just a bit. Why start with proper care during use? It just seems like the right place to start!
I thought about flipping a coin to decide and that felt too much like random fate. In a world of chaos, I get to control this one thing. Just roll with it.
There are some steps that we can take when recording the voice to help prevent junk buildup during use. A few preventive measures that mitigate debris and moisture will save you weeks of downtime heartache down the road. Or rather, weeks of unscheduled downtime. The worst kind. Worse than chicken pox. Or an epic hangover. Some people might think it’s worse than DOMS after an incredible workout but those people are silly heads and need to rethink their life.
Where was I? Oh yeah, proper care! Microphone maintenance! Those two words both start with M! COOL!
Protection from the Misty Dawn
This one is going to come in two forms: environmental humidity and the orifice from which breath and matter is expelled from the confines of your human body. Both of these things can be significant effectors of making our recording devices not want to behave themselves. Continued misbehaving can lead to a long term time out where they go stand in the corner of a repair shop and think about what they’ve done, even though it wasn’t actually their fault! They were FRAMED.
Ahem. Moving onward.
Ach, it’s so humid
(the like …. six of you who remember the 90s probably remember that quote.)
Environmental humidity can be a complicated problem depending on where you live and your regional predilection toward moisture in the air. If you live in the state of Arizona, for example, the likelihood of large-scale humidity is relatively low. With an average humidity level below 50%, unless you try really hard you will not have much of a mold problem. Or moisture accumulation on the diaphragm of a high quality microphone. Compared to Connecticut, as an example, with an average humidity level well above 50%. There are going to be natural problems there.
Except have you ever been in a recording booth for a good solid hour and the window is fogged up by the time you’re finished? The window looks like the mirror in the bathroom after a good long hot shower, except if you’ve been in that environment for an hour you are likely not clean. But also not dry so kinda like a shower. Sauna-esque things are happening in there. All that humidity in the air that has built up on your booth window also has the potential for building up on your microphone!
If you have ever experienced this, please refer to the upcoming section about proper care during storage. It is crucial that any moisture be dealt with during storage to extend the length of time between cleaning needs.
Say it, don’t spray it
Believe it or not, when we speak or sing in the direction of a microphone, we are expelling more than just breath and tone. If the recent global pandemic has taught us anything, we have learned more about particle dispersion where exhaling is concerned than at any other point in our microcosmic history. With that being said, the very same particle dispersion that has the potential for spreading viruses amongst the populace can also spread particulates into the loving embrace of your microphone.
Microphones are agnostic; not only do they believe the universe is innocent until proven guilty, they also capture EVERYTHING without any form of bias. If your face hole is aimed directly at the grill of your microphone without anything acting as a diplomatic neutral-zone between you and it, all of those itty bitty particles are likely going to end up on the recording surface of your mic. Moisture build up can prevent the microphone from properly detecting sound vibrations or worse: create them out of nothing. Microphone maintenance is hampered by spittle, clearly.
The solution? No matter how good your mic technique is, consider putting a pop filter between you and it anyway. The ones that feel like nylon stockings with a couple layers are reportedly the best for this; metal and plastic pop filters prevent plosives from getting through but they are far less effective at preventing the effluent efflux of your mouth setting up shop on the mic.
Protection from the Destructive Deluge of Debris
As with the discussion of moisture just a bit ago, dust and debris have the potential to absolutely ruin the function of a large diaphragm condenser microphone. If the microphone is being used in an environment where there is plenty of dust in the air, the more dust around the stronger the chance of buildup on the plate inside the grill. That alone is cause for concern and should be dealt with ahead of time. Keep your recording environment as free of dust as possible. There are silent electric ion air cleaning devices that you can acquire that will assist with this matter quite easily. Yes, the Sharper Image has a reputation for selling a bunch of wonky stuff. But that thing? Lifesaver.
If you combine the dust potential with an ultra humid recording environment, what ends up happening is moisture on the recording plate builds up and then any dust in the air is going to stick to it like white on rice. Once the humidity has fallen away, the dust is already quite comfortable where it is and isn’t going anywhere without a fight. The best way to solve this potential problem is to make sure that you’re recording in a space that is as dust free as possible. It’s never going to be 100% but it can certainly stand to maybe do better than 20%…
The “Too Long Didn’t Read” version is: keep your studio clean. Get a Swiffer wand or something. Prevent buildup of dust so that it won’t get into the mic.
Proper Care During Storage
If you have a microphone that you use on a fairly regular basis, one of the things you’re not going to want to do is put it away and get it back out Every. Single. Time. You. Need. To. Use. It. We live in a very convenient age and having things right there ready to go is sometimes the difference between finishing a project and having to delay.
Why do I say this? Because -I- am the kind of person who relies on that convenience. I walk out into the studio, activate the screen on the main desktop, load up a DAW session, tweak some filenames, and then jump into the booth and get after it. The sequence missing from that scenario? Opening the box the microphone is contained in. Gently removing it from the confines of said box. Lovingly attaching it to the shock mount. And then recording some goodness.
Why is that missing?
L A Z I N E S S.
Or rather, a misconception of convenience. Because lets take a look at it from a macro level. Imagine the number of minute(s) it takes to remove the microphone from a bag inside of its case and then getting it to the mic stand, attaching the cable, firing up the electronics, and THEN finally recording. When finished, powering things down, removing the cable, detaching the mic, putting it back in its bag and then in the case.
Over the course of time, this adds up! And again; lazy.
So now that I’ve outed myself, it’s time to share the storage tips I have learned straight from the mouth of a significant manufacturer: Lauten Audio. (pronunciation check. please forgive any errors)
Storage methods to avoid dust
The two things that were recommended to me from Lauten Audio are as follows:
- (less effective solution) When not using the microphone actively, envelope it within a cloth covering of some form. This will protect it from environmental dust that may be lingering in the area.
- (more effective solution) Remove the microphone from the stand, place the microphone back in its original cloth bag, then place the microphone in the wooden case it came with.
For the above in step two, you can use whatever the container was provided by the manufacturer. Rode and Sennheiser provide leather-ish bags for their shotgun mics. Those will do. The Stellar X2 and even the Behringer B-2 microphones come with small suitcases for storage. Use them. Protecting the microphone from the ambient environment while you’re not using it is critical to long term preservation of the recording elements.
Storage method to avoid moisture
This method is mentioned second in this list because it is an additional step to the recommended dust-prevention opportunity. You’re already going to be placing your microphone within the confines of its container – hopefully – so on to the next extra step.
You know those silica gel packets that come in everything from packs of beef jerkey, medications, every new electronic toy you receive, etc? Ever wondered what those are for? They absorb moisture like nobody’s business. Where could this come in handy? If you have microphones in their containers and the environment is still relatively humid? Adding some of these silica gel packets inside the containers is going to be super helpful.
Rather than repurposing the ones that come with your food – remind me to tell you the story of how I made a Shure Beta 57a smell like bacon for a few years – you can order them from most places that sell things. Like Amazon. I’m a fan of the ones that can be recharged in the oven rather than single-use versions.
Another suggestion is if you have a room that they are being stored in and the room is consistently humid, invest in a dehumidifier. Turn it off when recording, back on for the other many hours of the day and night when not.. Reducing the humidity level overall in the room will work miracles for microphone longevity.
But probably still use the silica gel packets. Just to be safe.
Proper Care During Cleaning
In a word, don’t.
Addendum: If you’re doing all of the things above during usage and storage, you probably don’t need to consider cleaning steps. Dust and debris will be kept to a minimum. The environment whether humid or dry will not have as much of an impact.
If you’d like to be super crazy intimidated by the large diaphragm condenser microphone cleaning process, hop on over here and get a look at how it’s done. Then after you watch that video, and you’ve had a chance to do some heavy breathing – possibly dry heaving – please contact a professional to get it cleaned. You won’t thank me later because you won’t ever need to be in that position in the first place.
]]>