Podcasts have become a popular way to consume content, whether for entertainment, education, or both. A big part of what makes podcasts so great is that they’re usually free and easy to find online. And, with the rise of smartphones, podcasts are more portable than ever.
But, in order to create a podcast, you need two things: a microphone and some software to record and edit your audio.
What Are the Different Types of Microphones
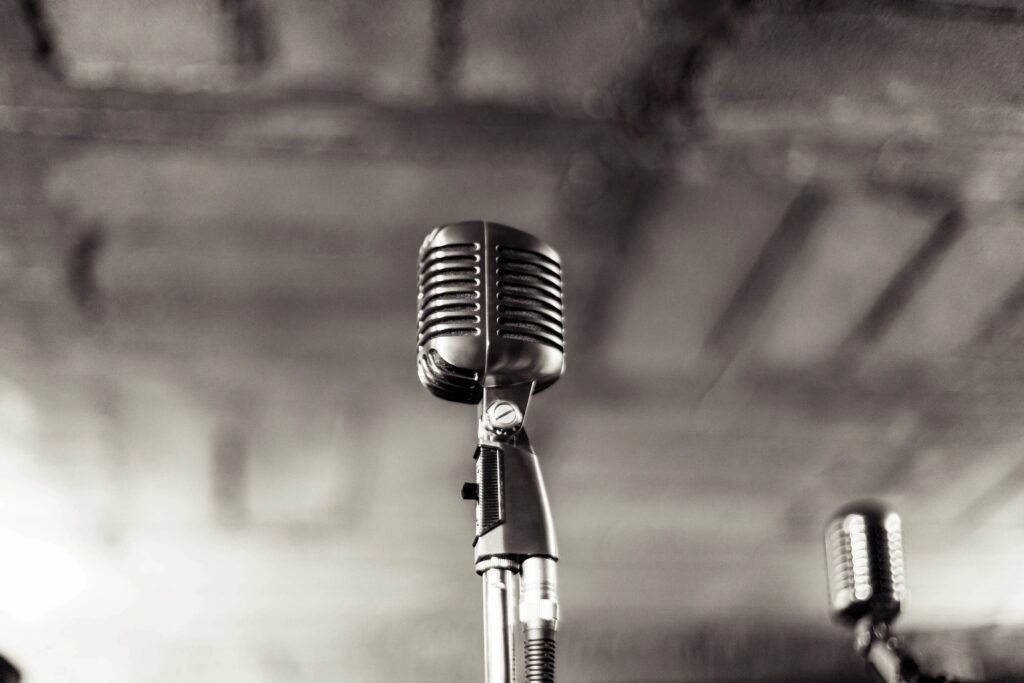
There are a few different types of microphones that can be used for podcasting. The most popular type is the dynamic microphone. Dynamic microphones are great for podcasts because they’re relatively inexpensive and they don’t require any extra equipment (like a preamp).
Another type of microphone that can be used for podcasting is a condenser microphone. Condenser microphones are more expensive than dynamic microphones, but they offer a few advantages. First, they tend to have better sound quality. Second, they’re more sensitive, which means they can pick up a wider range of sounds.
If you’re just starting out, we recommend using a dynamic microphone. They’re more affordable, and they’re easy to use. As you get more experience, you can upgrade to a condenser microphone if you want to.
What Are the Top Microphone Etiquette Tips You Should Know
Microphone etiquette is often overlooked, but it is essential to know the basic tips to get the most out of your microphone. If you’re planning on starting a podcast, there are a few things you should know about microphone etiquette. Here are the top 8 tips to follow:
1. Always Test Your Microphone before Recording
It’s important to test your microphone before recording to ensure it is working properly. This can be done by recording a short clip and then listening to it. If you notice any static or other issues, try adjusting the position of the microphone or moving to a different location.
2. Hold the Microphone Close to Your Mouth
When speaking into a microphone, it is important to hold it close to your mouth. This will help to ensure that your voice is being picked up clearly. Avoid speaking too close to the microphone, as this can cause distortion.
3. Speak in a Clear Voice
When recording, speak in a clear voice. This will help to ensure that your podcast is easy to understand. Avoid mumbling or speaking too quickly, as this can make it difficult for listeners to follow.
4. Avoid Making Noise during Recording
It can be difficult to avoid making noise when recording, but it is important to try. Background noise can distract listeners and make your podcast difficult to hear. If possible, record in a quiet room or use a soundproof booth.
5. Avoid Moving the Microphone
When recording, it is important to avoid moving the microphone. This can cause the sound to become distorted. If you need to move, do so slowly and carefully.
6. Always Proofread Your Script before Recording
As a voice actor, one of the most important things you can do is proofread your script before recording. This will help ensure that you are delivering the lines as intended and that there are no errors.
7. Take Breaks as Needed
If you find yourself getting tired, take a break. It is important to be well-rested when recording. This will help to ensure that your podcast is clear and easy to understand.
8. When Editing Your Recording, Be Mindful of the Levels
If the levels are too low, your recording may sound quiet and difficult to hear. If the levels are too high, your recording may sound distorted and difficult to understand.
]]>What is ‘mic technique,’ and why does it matter?
As a concept, mic technique describes your relationship to your microphone when recording. It comprises a handful of factors including mic level, proximity, voice level, and mic angle. While these elements apply broadly to microphone recording, your management of them will vary depending on your specific mic setup, voice, and environment.
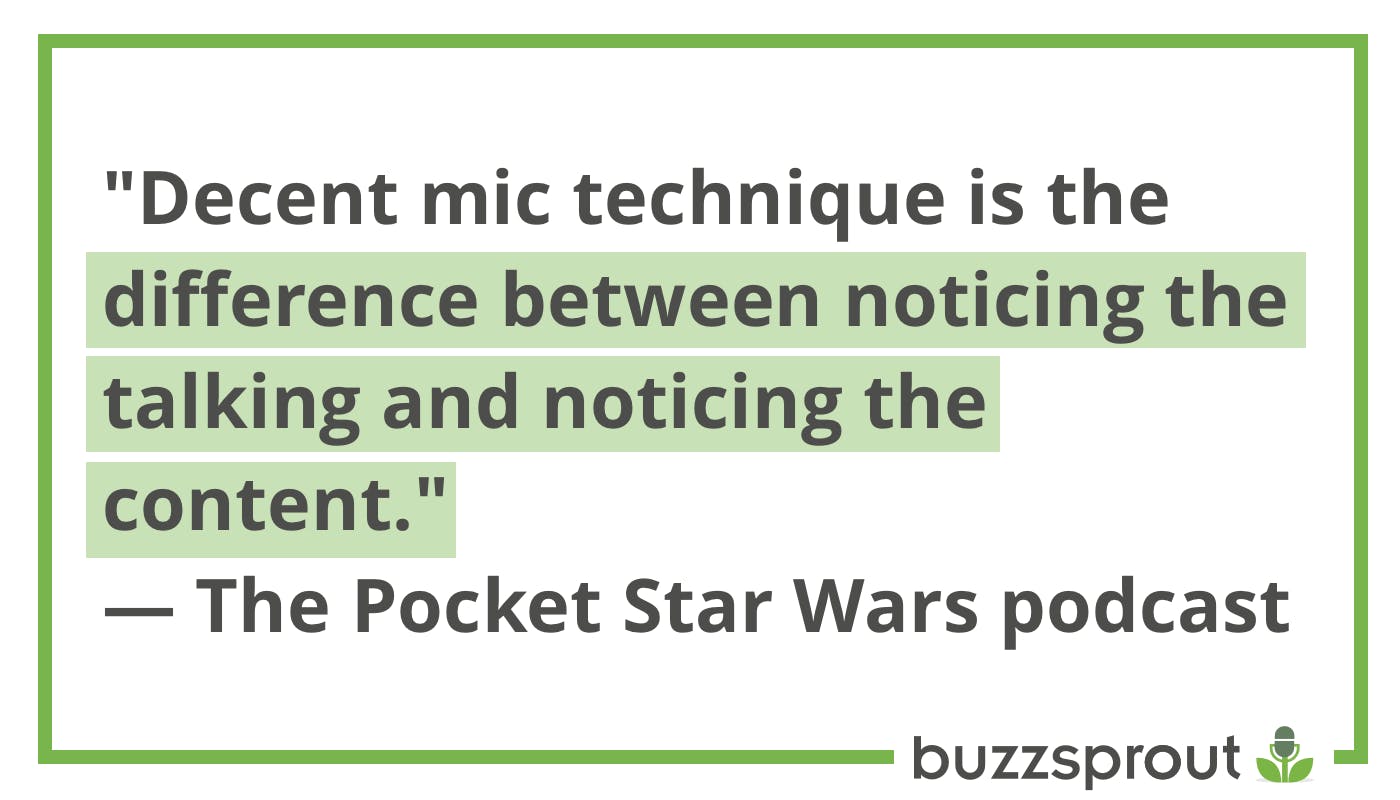
Mic technique matters because—once more for everyone in the back—what’s heard in your recording has more to do with your approach than your equipment. Good mic technique can elevate a mediocre-sounding microphone. Poor technique can utterly ruin a recording on even the most expensive microphones money can buy.
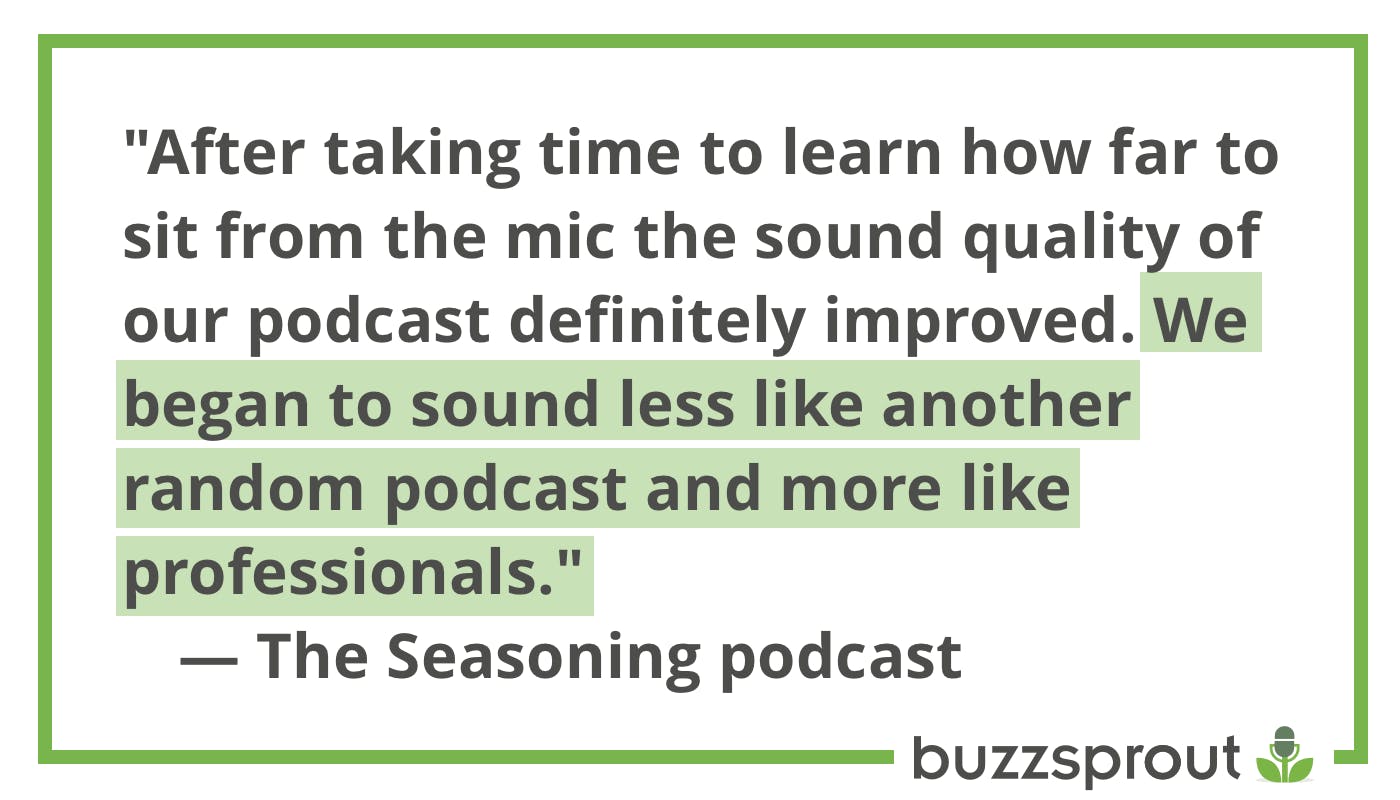
Good mic technique can help you avoid harsh sibilance, plosives or “p-pops”, overdrive/clipping, and roominess. Ignoring it can mean succumbing to all of those pitfalls, which makes for a less enjoyable listening experience and ultimately fewer listeners.
In short, without good mic technique, you may very well be wasting effort on your podcast.
How to develop good mic technique
Let’s take a look at the four elements mentioned above – mic level, proximity, voice level, and mic angle – to see what problems they address, how they interact with each other, and to discover how to leverage them toward better-sounding episodes.
Mic Level
The first step in the process is getting your mic level set. The terms “gain” and “input level” may be used interchangeably to describe the amount of signal being fed into your microphone. This is usually set via your interface or mixer.
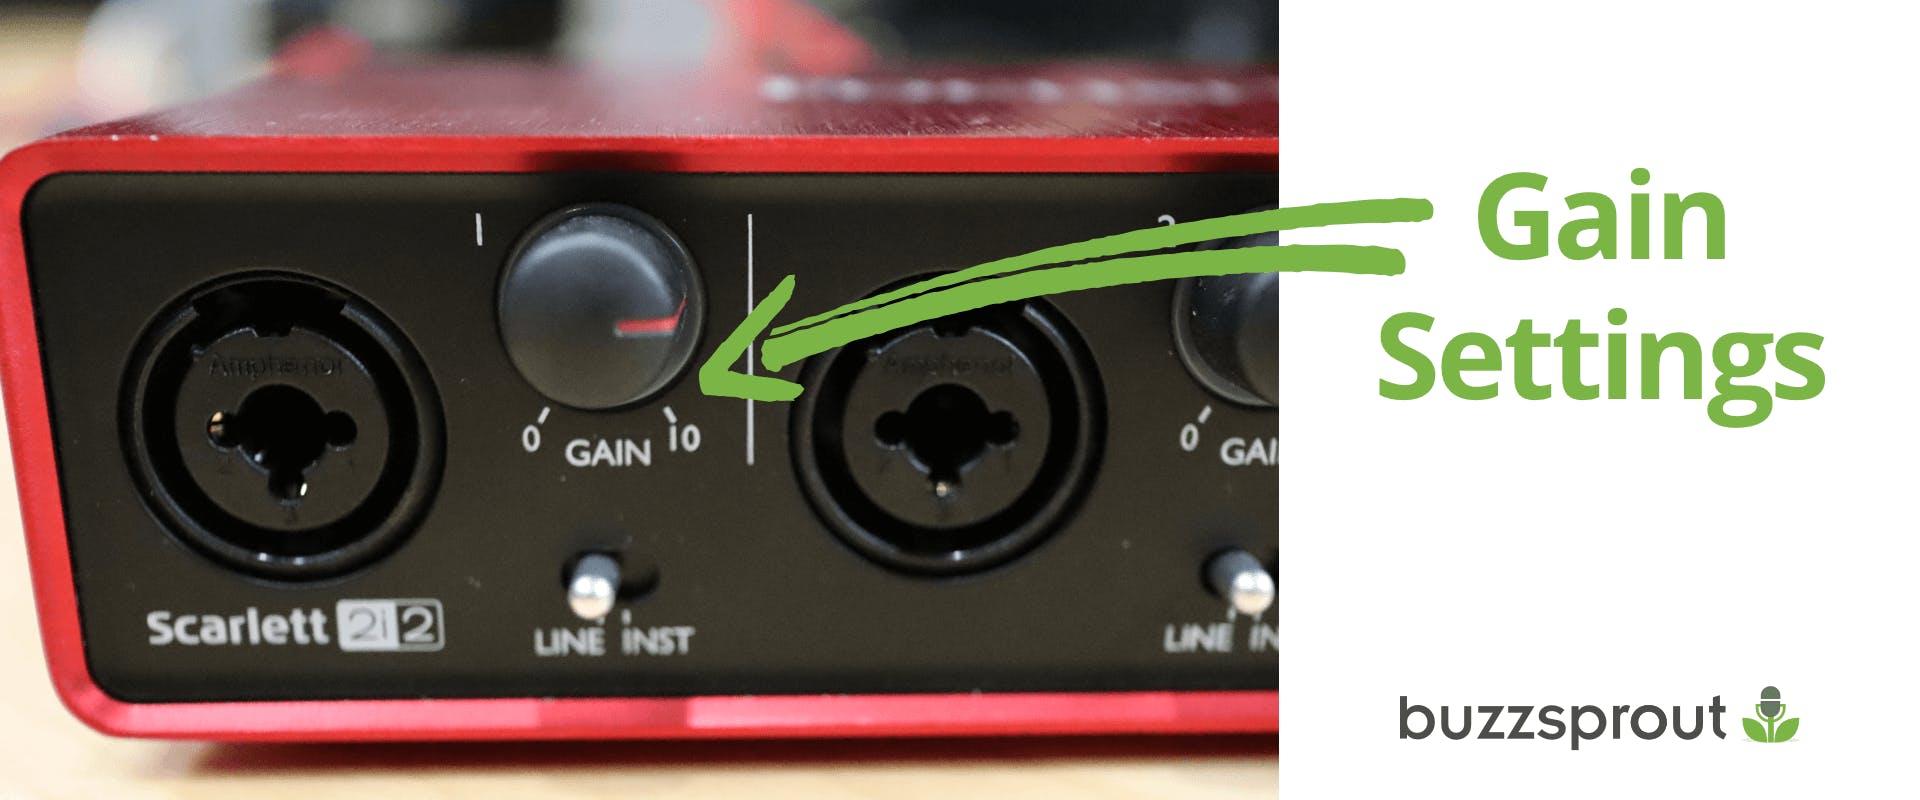
It should be noted that gain is a separate control from a fader or output on a mixer or in your DAW. Gain determines how much signal goes in; a fader controls how much signal goes “out” to your mix. You can easily end up with poor audio quality if the input level of your microphone isn’t set correctly – too little gain and you may introduce hiss as you try to turn it up later, too much gain and you may overdrive or clip your recording.
A common misconception is that you should always record hot. This is a holdover from analog days where recording equipment had a higher level of inherent noise, which would become more apparent if your input was too low. Modern digital recording offers a typically quieter signal path and the margin between “too low” and “too hot” is more generous these days.
To set a healthy level, speak into your mic as you will be during recording and adjust the gain or input until you see peaks on your meter in the -10dB range. This should keep you out of the clipping danger zone, while still affording you a clean capture that can be turned up later if necessary.
Pro Tip: Adjust the gain knob on your audio interface or mixer until you can hear it buzzing in your headphones, then turn it down slightly.
This will help you when you go to edit the audio file in GarageBand (Mac) or Audacity (Windows) since you’ll be starting with strong, high-quality audio.
Proximity
How close you are to a microphone determines the impact of what’s known as “proximity effect” on your recording. Simply put, the closer you are to a microphone the more low-frequency information it will pick up, meaning a more “upfront” or “full” sound. The further away you get, the less low-frequency information and the more reverb/echo the mic will hear, meaning a more distant or “roomy” sound.
This is how our brains interpret sound in the real world – the sound of “closeness” includes lots of low-end frequency information, and the sound of “distance” is in part the sound of diminished low end. When you combine distance from your mic with an enclosed room, things begin to sound echoey and less intimate, problems that are difficult or impossible to solve after the recording is done.
Generally speaking, mics need you close. Four finger-widths from the microphone capsule is a good place to start, but different mics have different levels of sensitivity, so try different approaches and use your ears. If you’re too close, the mic will pick up an unnatural amount of sound from your mouth and listeners may feel like you’re salivating or breathing on them (yuck). If you’re too far, you may start to notice more reverb or a decrease in the low end.
You want the tone of your voice to sound full and present like it would in conversation in a quiet environment. With this in mind, tailor your distance from the mic to taste.
Pro Tip: Use a microphone stand or boom arm to position your podcast microphone close to your mouth.
Voice Level
The next consideration is the level of your voice, which will dictate sound pressure level (SPL) going into a mic. How loud you talk determines the SPL hitting the microphone, which in excess may cause overdrive or clipping. How much perceptible reverb ends up on the recording also depends in part on your voice level – a louder voice will produce a louder reflection off the wall or floor. In a multi-mic setup, louder speech may bleed into additional microphones and cause headaches in the editing or mixing phase.
Speaking at a consistent level is crucial for a balanced recording. Avoid extremes – don’t expect your mic to respond the same way to a whisper as it does to a shout.
If you are a more dynamic speaker, complement your voice level with appropriate mic level and proximity. Backing off the mic a bit when you get loud will help disperse sound pressure before it hits the mic, preventing clipping and plosives, for example. Leaning in a bit closer if you’re speaking in a hushed voice will concentrate sound pressure on the mic, helping your listeners understand what’s being said even in quiet moments.
If you’re not talking, back away from the mic. It will help listeners focus if you’re not breathing into it during someone else’s turn to speak, for example. Lower levels of background noise will also benefit the mixing process, where a gate plugin can be a useful way to minimize distractions.
Pro Tip: Turn off electronic devices, fans, ticking clocks, and anything else that might contribute to unwanted room noise.
Mic Angle
Every microphone has “a sound” to it – defined by its sensitivity to different frequencies. Some mics are “darker,” meaning they are more sensitive to lower frequencies; some are “brighter,” meaning they are more sensitive to high frequencies. A “warm” sounding mic may be slightly more sensitive to the midrange, and less sensitive to highs & lows.
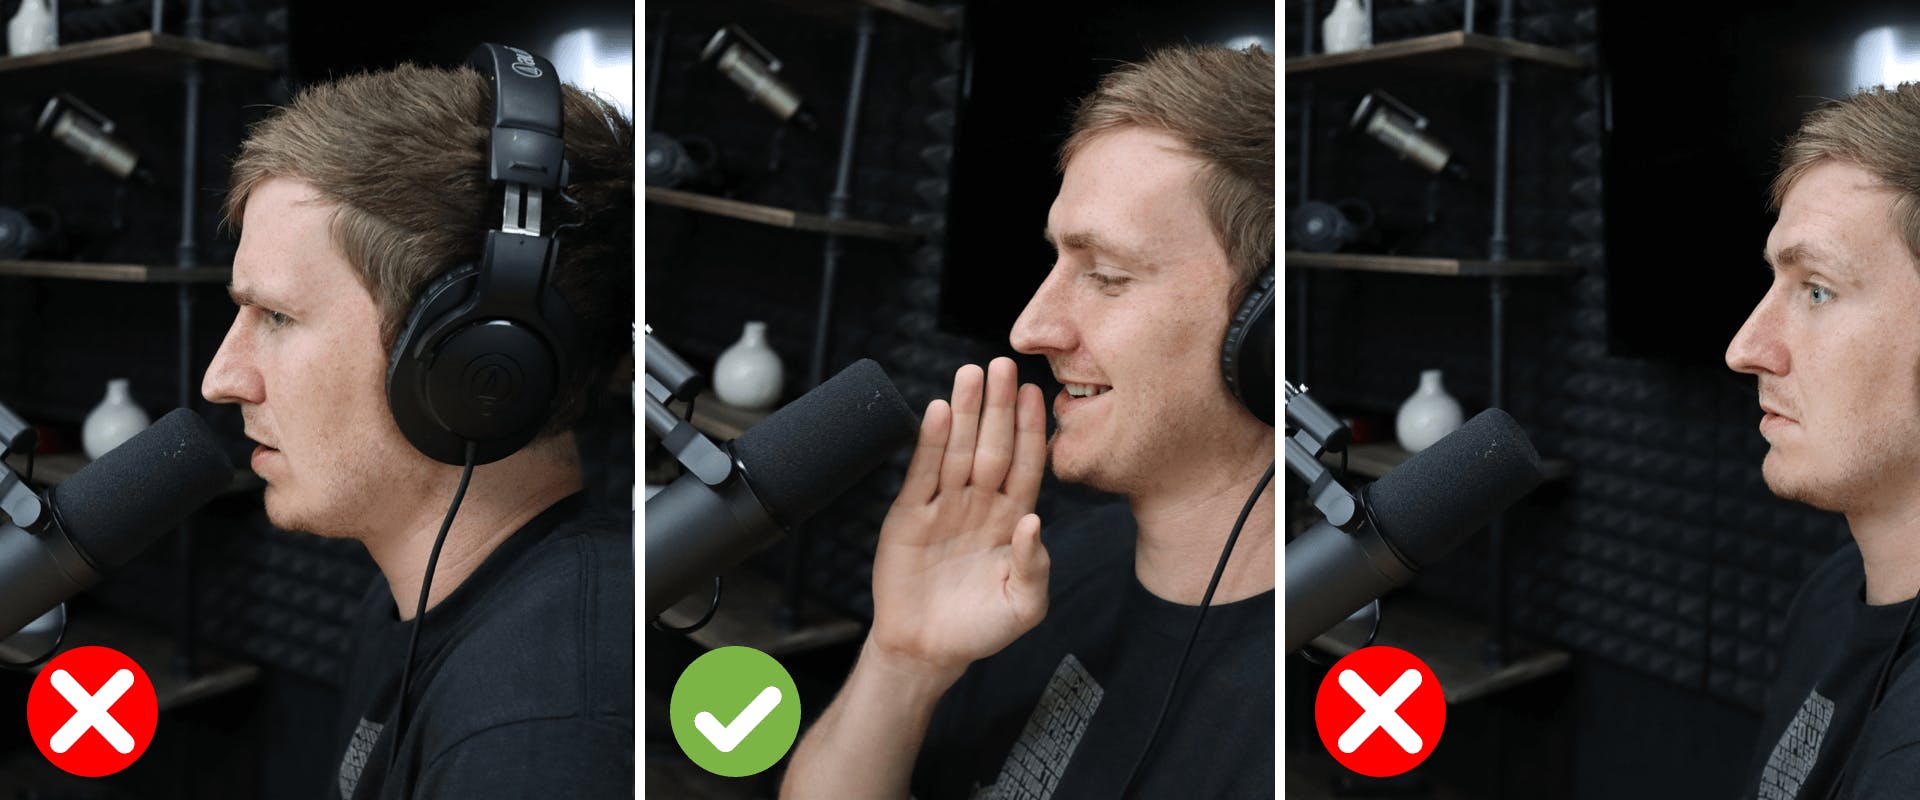
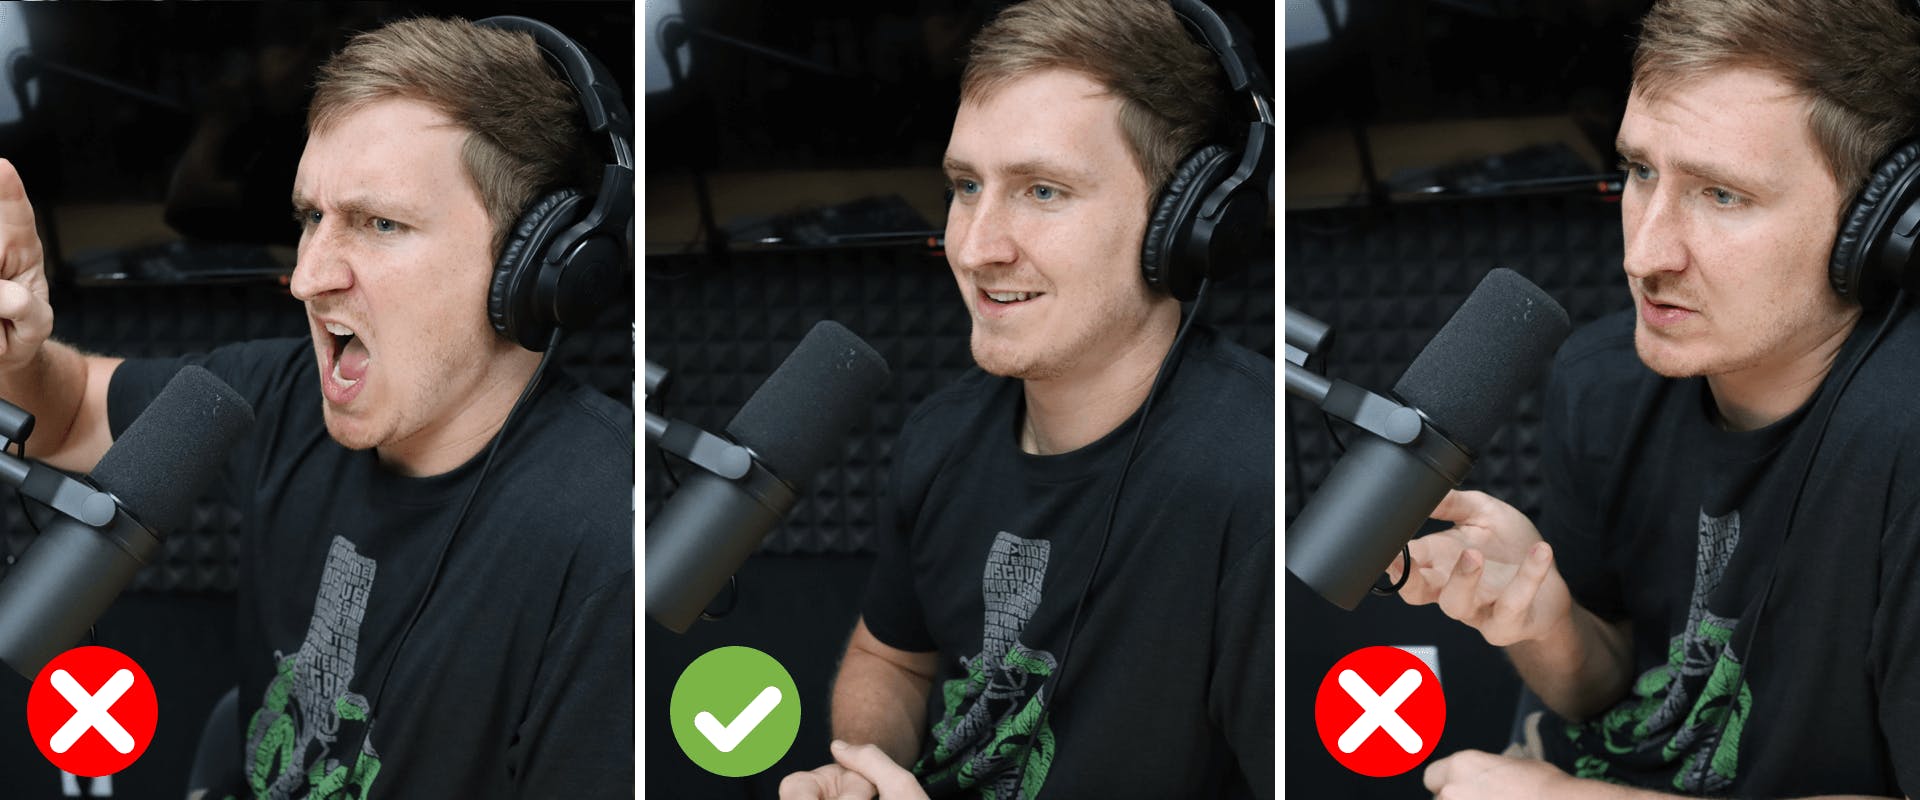
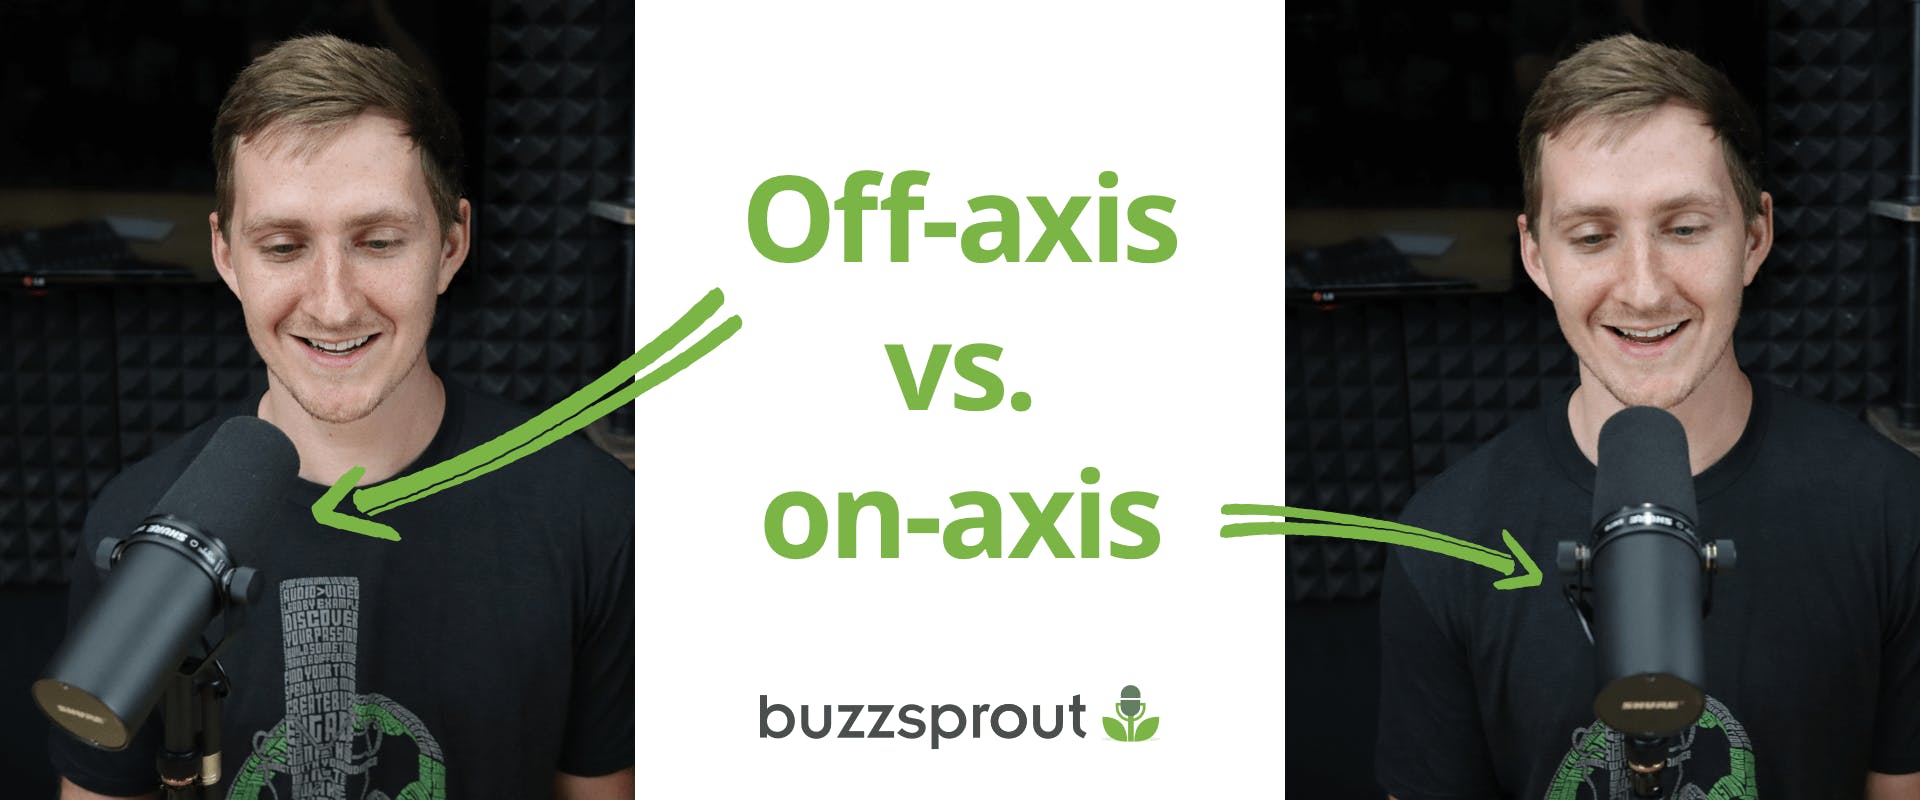
To figure out what quality your mic may impart to your voice, it can be helpful to experiment with mic angle in relation to your mouth. This is what is meant by “on-axis” and “off-axis” recording.
On-axis essentially means perpendicular to the microphone, a setup where the mic is pointing straight at your mouth. This will typically result in the brightest recording, meaning more high-frequency content. If your mic is less sensitive to high frequencies, this may provide you with the greatest clarity. If it is more sensitive to highs, you may feel that the recording is harsh or overly sibilant. Plosives may be a more frequent hazard on-axis, as they tend to have a high SPL. This can sometimes be mitigated by using a pop filter – more on that below.
Off-axis recording is one solution to high-frequency harshness. From its on-axis position, twist the microphone slightly to the side and try another test. Aimed indirectly at your mouth, the microphone should now be less sensitive to high frequencies. If you still hear plosives, shift the microphone laterally so that it is no longer directly in front of your mouth. You should now be speaking “past” the capsule rather than directly into it, which should mitigate plosive pops. Depending on the direction you move it, an additional twist toward or away from your mouth may be necessary to address any high-frequency changes.
Pro Tip: Conduct several voiceover audio recordings and listen back to them in your audio editing software (do this with your co-host as well). It’s often easier to hear the changes you need to make when you can listen to the recording.
Pop Filters
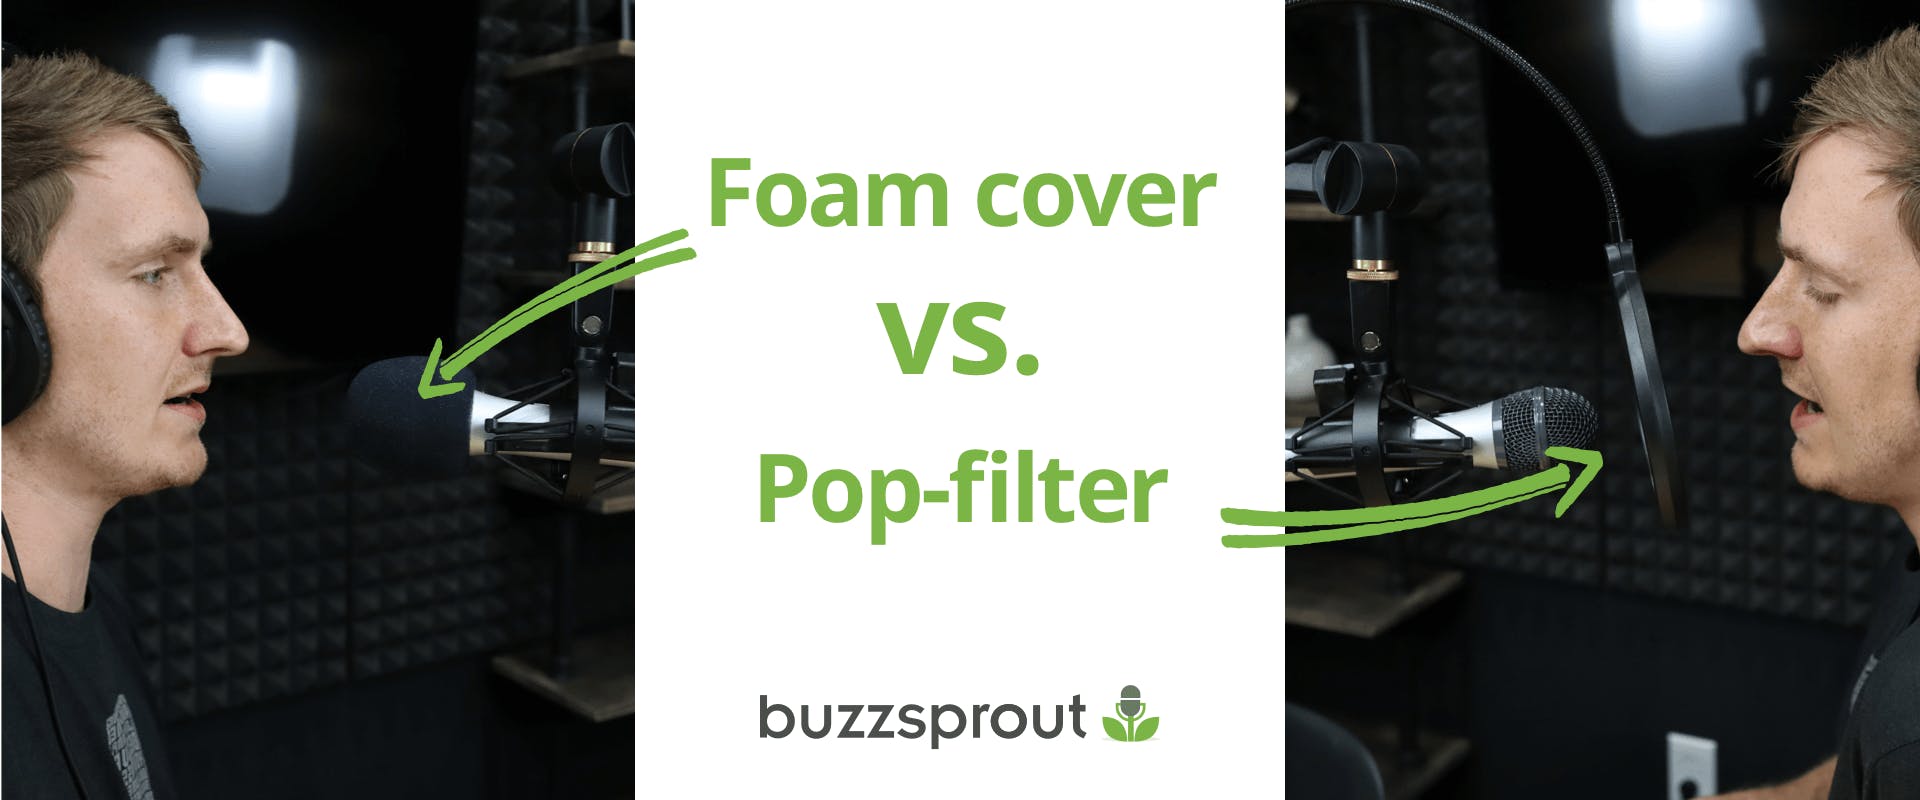
Another method for dealing with plosives is to use a pop filter, which can help disburse large sound waves before they cause distortion. The typical pop filter is a mesh or metal disk at the end of a flexible gooseneck that clamps on to your mic stand. Attach the clamp so that the filter is within a couple inches of the microphone capsule, then speak through the filter from an inch or so away. Exact placement will vary depending on your mic setup, so use your ears and go with what sounds good to you.
Like pop filters, foam covers reduce the impact of plosives by diffusing and redirecting the air coming from your mouth. Foam covers are a popular solution for podcasters who record in a variety of different environments and want to streamline their podcast setup as much as possible.
Pro Tip: Another accessory we recommend is a shock mount like the On-Stage MY420. It will minimize bumps and table sounds so they don’t impair the quality audio you capture.
A quick note on mics
Mic choice will always inform your mic technique. As mentioned above, each microphone will impart its own sonic characteristics to your voice. Different types of microphones require different levels of gain, respond differently to proximity, and are rated to handle SPLs differently. The two most common types are dynamic and condenser microphones.
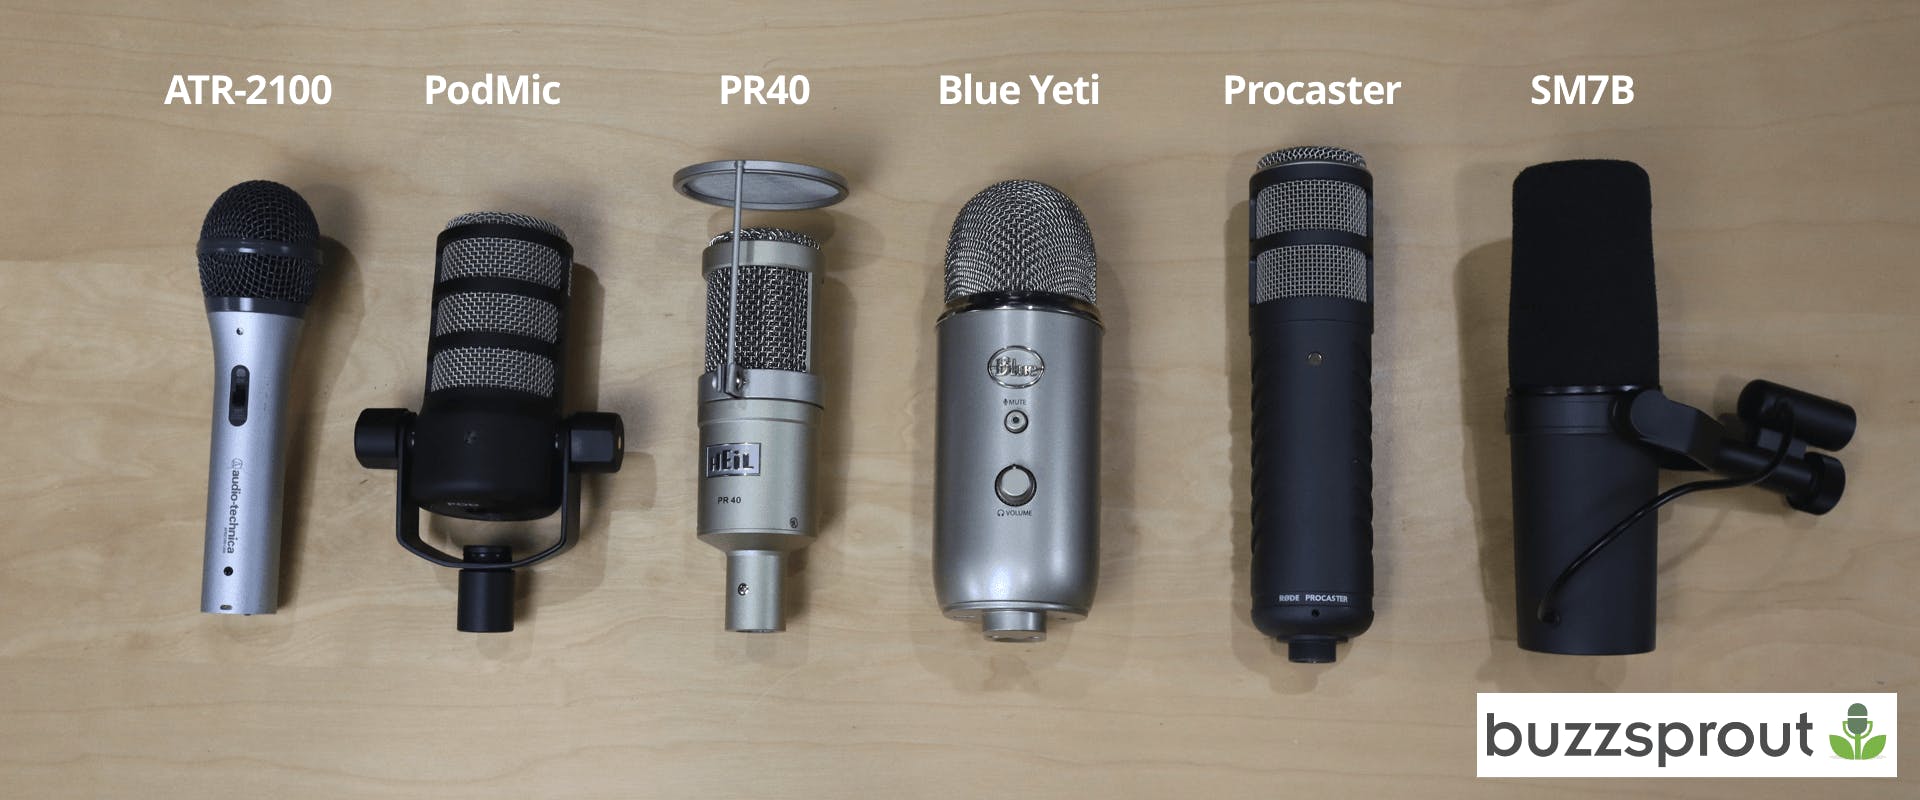
Dynamic microphones like the Audio-Technica ATR2100 are less sensitive and can handle higher sound levels. Their design is simpler than a condenser and more rugged, which makes them ideal for mobile rigs and more extreme environments. While costs run the gamut, even high-end dynamic mics tend to be less expensive than condensers.
Condenser microphones like the Blue Yeti are often preferred for their greater sensitivity and more natural sound, especially in higher frequencies. Their design is more complex and more susceptible to environmental changes, making them more ideal for studio use than mobile contexts. Because of their construction and quality, condensers can be more expensive than dynamics.
Pro Tip: Make sure the microphone you choose has a cardioid polar pattern, which isolates the speaker and reduces unwanted background noise so you can make the best podcast possible.
A quick note on acoustics

A sound bouncing off a hard surface in the right conditions produces a classic echo (“echo… echo… echo…”). Echoes in most environments tend to be less distinct than that, and slur together into what we call reverberation, or reverb. Every room you record in will add some amount of reverb, which may benefit or detract from your recording depending on what you want.
If you find that your room is lending too much audible reverb to your recordings, do what you can to add a barrier between your voice and any hard surfaces. Laying rugs on the floor, hanging moving blankets or quilts as a makeshift recording “booth,” or even just adding soft furniture to the room can all help mitigate unwanted reverb. Using a dynamic microphone instead of a condenser may help resolve the issue as well.
]]>Contents
Microphone Tips for Presenters and Speakers
1. Don’t Hide Your Face with the Microphone
2. Hold it Very Close to Your Mouth – Closer than You Think
3. Keep Your Microphone Arm Completely Stationary
4. Test the Mic Before Your Speech Begins
5. Podium Microphones: Position the Mic So You Don’t Have to Slouch
6. Don’t Wear Jewelry That Will Bang Against the Mic
7. Avoid Long Hair Brushing Against the Mic
Microphone Tips for Presenters and Speakers
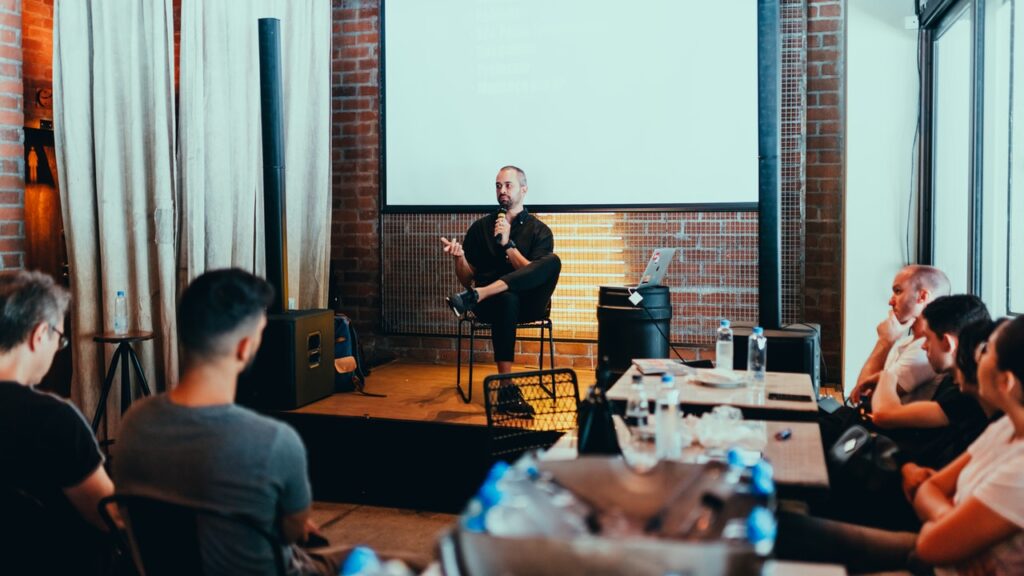
It’s not natural to speak into a microphone. So using it properly will take some practice. Keep these tips in mind.
It may seem inconvenient to remember all these things, but remember that your microphone is your voice.
Poor use of the microphone means your voice will get lost, or the audience will have a hard time hearing you.
If they can’t hear you, then they can’t receive your message. It’s that simple.
I’ve seen many otherwise great speakers use microphones incorrectly and their impact suffers massively as a result. I’ve made these mistakes myself as well.
1. Don’t Hide Your Face with the Microphone
For stationary mics attached to a podium or table, move it down so that it’s not blocking your face.
This is especially important for short people standing behind a podium.
Facial expressions are a major part of communication, so you need your face to be clearly visible to the crowd.
For hand-held microphones, position the mic so that your whole face is clearly visible. Hold it vertically so that it only blocks your chin.
Singers and rappers hold their microphone pointing straight out, which blocks the lower half of their face:


But for public speaking and presentations, you want to hold the microphone lower, so that your mouth is visible:


2. Hold it Very Close to Your Mouth – Closer than You Think
This is one of the critical microphone tips. It affects how loud your voice will sound.
Each microphone has different settings (which can be adjusted by the sound crew).
But as a general rule, it’s better for your voice to be on the louder side than the quieter side.
Notice the huge difference in volume between the moderator (the guy who is talking at 11:30) and the woman with the red scarf.
If you look, you will see that the moderator is holding the microphone in his lap, far away from his face. Whereas the woman in the red scarf holds it right in front of her mouth.
3. Keep Your Microphone Arm Completely Stationary
People inexperienced with microphones will often move their arms around as they talk, as if they were not holding it at all.
Obviously this is a mistake because your voice will keep fading in and out. The audience will have an extremely hard time understanding you.
This is another one of those habits that is easy to overlook, but which has a huge impact on your speech.
4. Test the Mic Before Your Speech Begins
You should never have to ask “can everyone hear me ok?”
You should already know that the mic is working long before you take the stage and begin speaking.
Arrive early and test it out so you can just hit the ground running when you open your speech.
If you will be turning your mic on and off throughout your presentation (for example, in a workshop), make sure you can do that without making it screech and hurting everyone’s ears.
5. Podium Microphones: Position the Mic So You Don’t Have to Slouch
Newbies have an urge to lean into podium microphones. This gives you bad posture and obscures your face to the audience.
Unlike with handheld mics, a podium mic should be sensitive enough to pick up your voice even when you are standing up straight.
Finally, two tips on wearable microphones:
6. Don’t Wear Jewelry That Will Bang Against the Mic
This is extremely annoying and distracting for the audience.
And it’s the kind of thing that is so minor, and so easy to overlook, but really interferes with the audience’s retention of your message.
Watch the following interview. Olivia, the guest in the pink dress, has a microphone on her collar.
Her necklace got tangled up with the microphone. You can hear an audible clicking and snapping as she speaks and moves throughout the interview:

This is one of those simple microphone tips that is easy to forget.
7. Avoid Long Hair Brushing Against the Mic
The same thing can happen with long hair.
from 2010 below. In the first few minutes, she is wearing a headset mic which keeps getting interference either from her hair or because it’s been placed too close to her face. So a member of the crew has to give her a handheld mic at 4:15:
]]>